
Smartphones have won the battle by a landslide over traditional compact cameras, but not precisely because of their quality, a quality that in recent years, and especially in the high-end range, has little or nothing to envy that offered by this type of camera. . The main reason was the comfort.
We always carry our smartphone with us, always. And with it, we carry a camera for both photos and videos (camcorders are the other product that with the arrival of smartphones saw its market collapse). With our smartphone, we can not only take pictures and videos wherever we are, but it also allows us save location thereof.
When we take a photograph, together with the file that we have created, a series of data is stored, called EXIF, which stores not only the exposure, shutter and other values, but also, if we have our camera configured so that record location data, also store them.
What can we do with eAre you data?

Thanks to the location data, and depending on the photo manager we use, we can quickly and easily locate where we have taken the photographs, without having to resort to converting the coordinates stored in a specific location.
As the years have passed, quality cameras, both reflex and mirrorless, have been adding this function, although sometimes it is a separate accessory that we must buy if we want to store our photographs next to a specific location.
If you think the time has come to start classifying your photos by location, especially if you like to travel, then we will show you how you can add location to photos that do not have it, because they were not made with a device that offers this function.
Add the location to a photo on Mac
To manage our images on a Mac, if we also use an iPhone, the best application we have at our disposal is the Fotos, an application that is available natively on macOS. If we want to add the location of a photograph from a Mac, we must perform the following steps.
- First of all, we must open the Photos application and select image that to which we want to add this information.
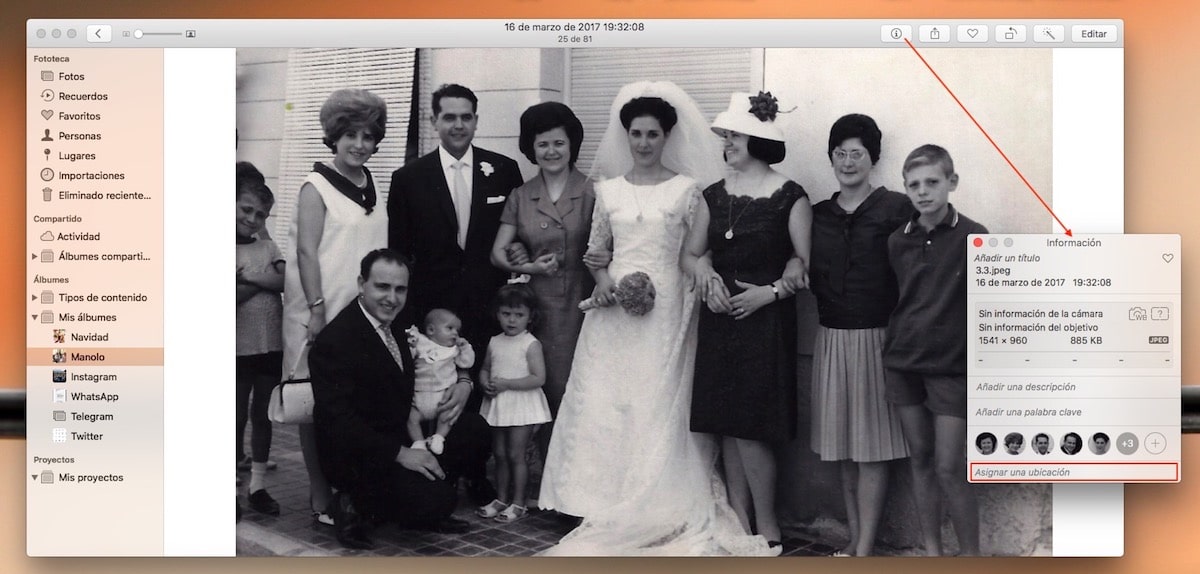
- Once we have selected the image, we must go to the top menu of the application and click on (i) to access image properties. This section shows the EXIF data of the image, which also includes the location if available.
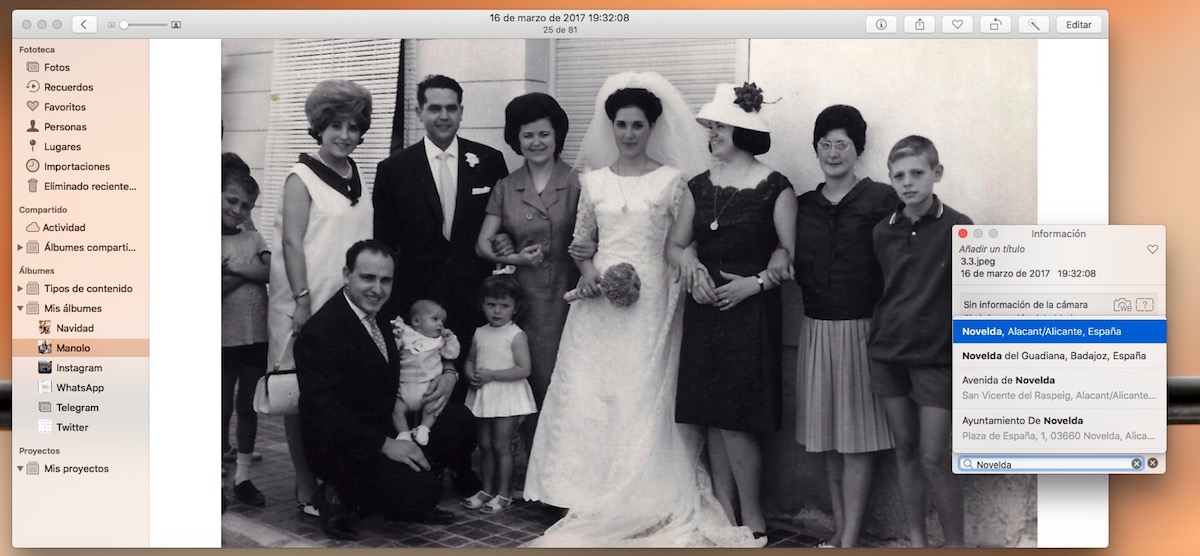
- In box Assign a location we have to write the place where it was made, in this case it is Novelda. Automatically, as we write, different options will be shown from which we can choose.
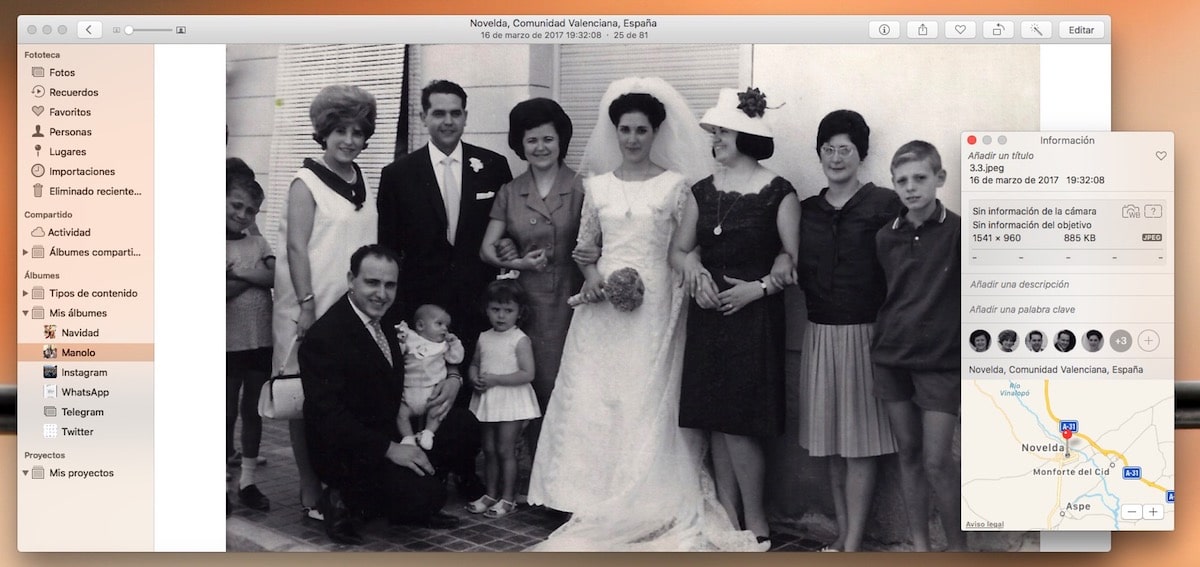
- Once, we have found the name of the location, we just have to hit enter. Next, the name of the town that we have selected will be displayed along with the map of its location.
To check that the application has recognized the new location that we have added to the image, we just have to use the option Photo Library> Places and find the image in the location we have set.
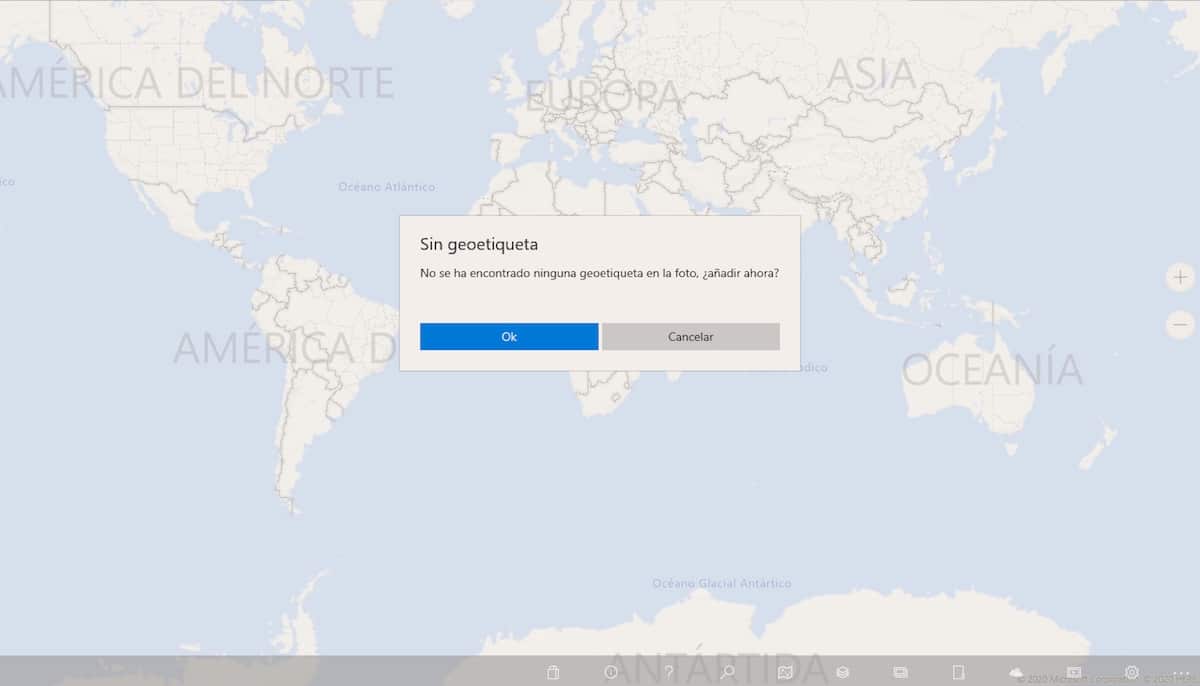
Add a photo location in Windows
Unfortunately, and unlike macOS, Windows 10 does not offer us any way to add the location to our photos, which forces us to resort to third-party applications. The application that offers the best results is called GeoPhoto - Geotag, Map & Slideshow. GeoPhoto is an application that we can download for free, and with which we can only add the location to three photos.
If we want to continue using it to add the location to more photographs, in addition to taking advantage of the rest of the functions it offers us (locate the images on a map based on their location), we have to go to checkout and pay the 5,99 euros it costs. Now that we are clear with which application, we can add the location to our photos with Windows 10, we show you the steps to follow.
- Once we have installed the application from the Windows Store, we select the image or images that we want to add the location to, click one the right button and we open them with GeoPhoto.
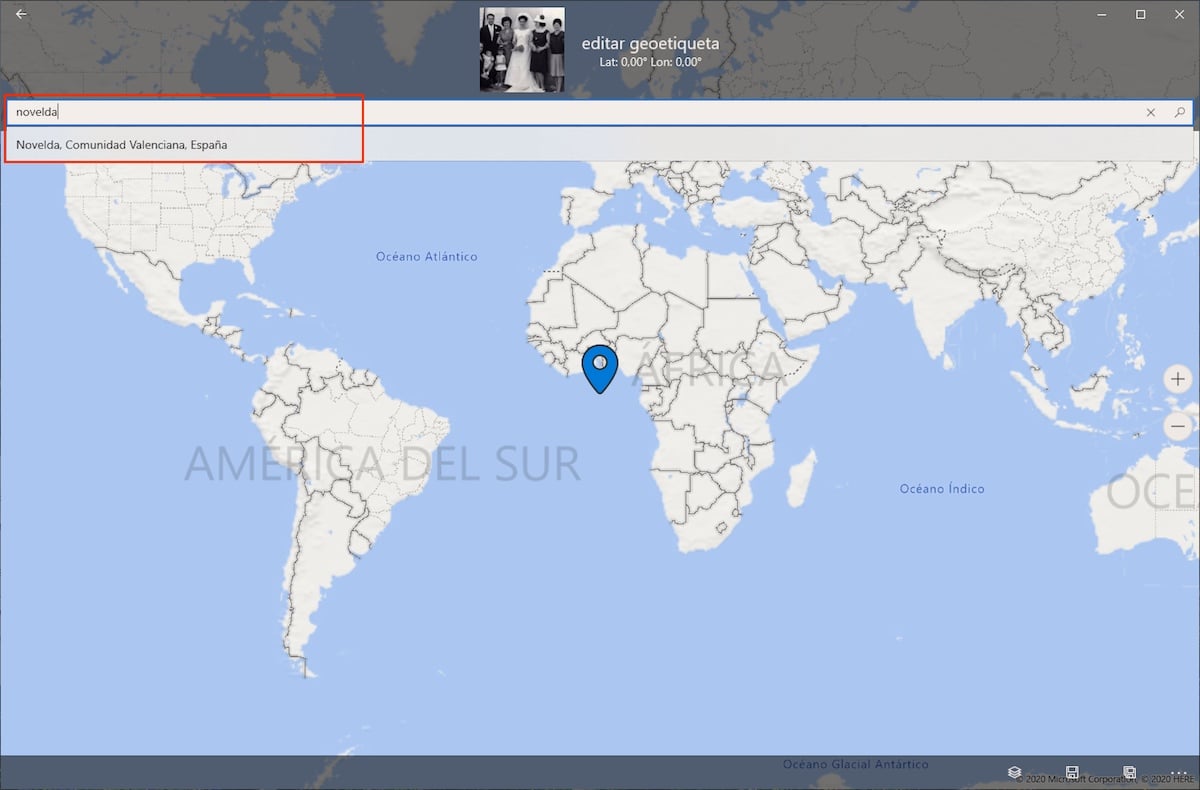
- Next, we must enter image location that we have selected in the upper box and select from the options that it offers us, which is the one that corresponds to the location. Finally, we must save the location in the image, through the save button located at the bottom right of the image.
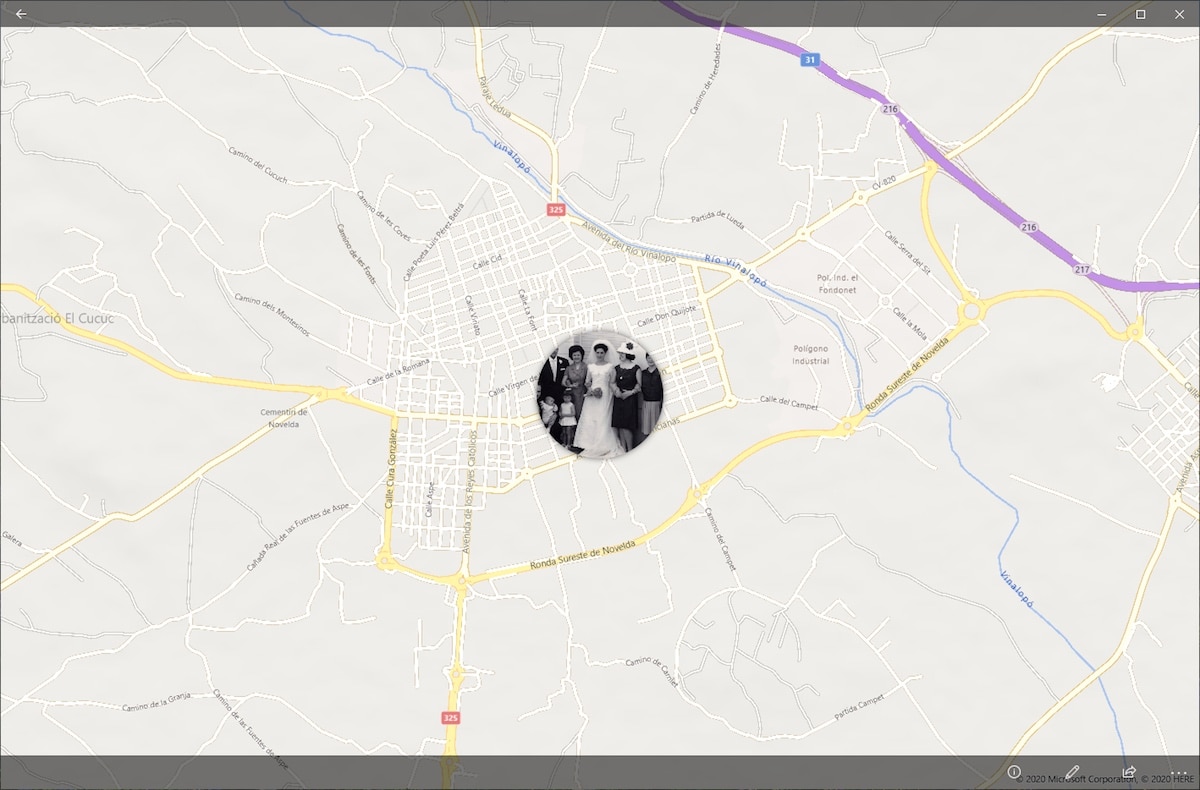
- To check that the location has been saved correctly, we just have to reopen the application with the image we just used to check how this is displayed on a map, making use of the location that we have added.
Download GeoPhoto from the Windows Store
Add the location of a photo on iPhone
In the App Store we have different applications that allow us to work with the EXIF data of our photographs, however not all of them allow us to add the location to a photo from the device.
One of the best options available in the App Store that offers us this function is EXIFViewer, an application that has a price of 3,49 euros, but we can also find a Lite version with a limited number of functions to be able to test all the functions it offers us.
If we want to add a location to a photo directly from the iPhone with EXIF Viewer, we must do the Next steps:
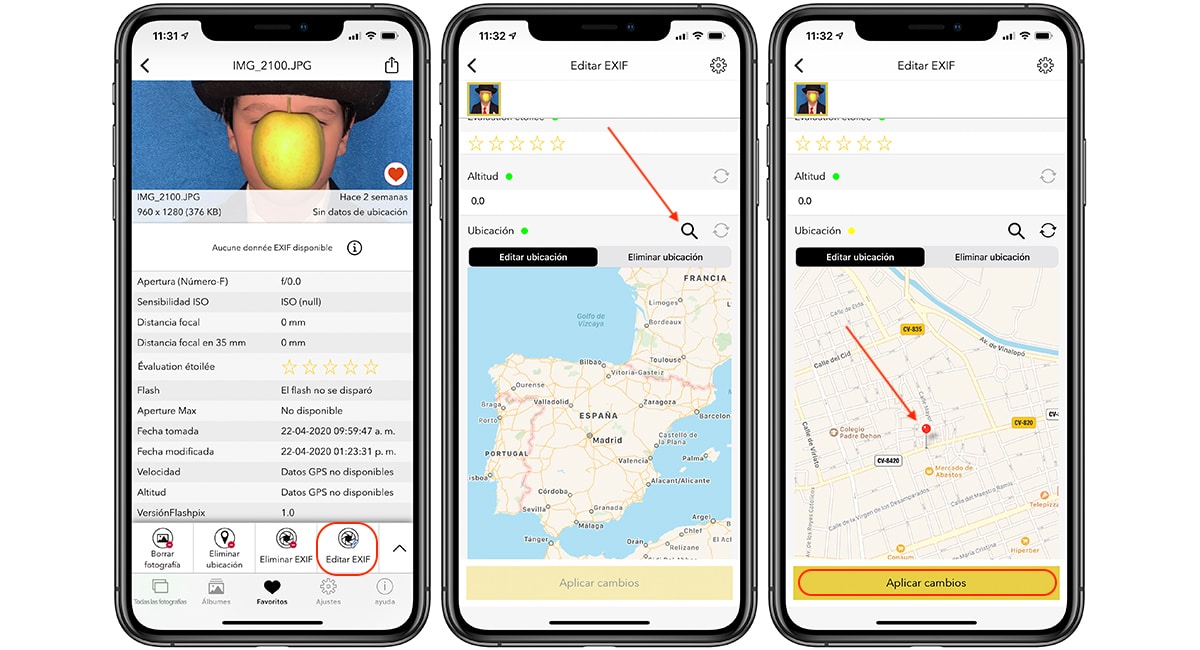
- Once we open the application, we must select image to which we want to add the location.
- Next, we go to the lower menu of the image and click on Edit EXIF.
- In the next window, we go to the bottom, inside Location, click on the magnifying glass to enter the name of the town where it is, we apply changes and that's it.
Add the location of a photo on Android
In Play we have at our disposal the Photo EXIF Editor application, an application that, as its name indicates, allows us to edit EXIF data of photos, either to add new data or delete existing ones. To add the location to a photo on Android with Photo EXIF Editor we must perform these steps:
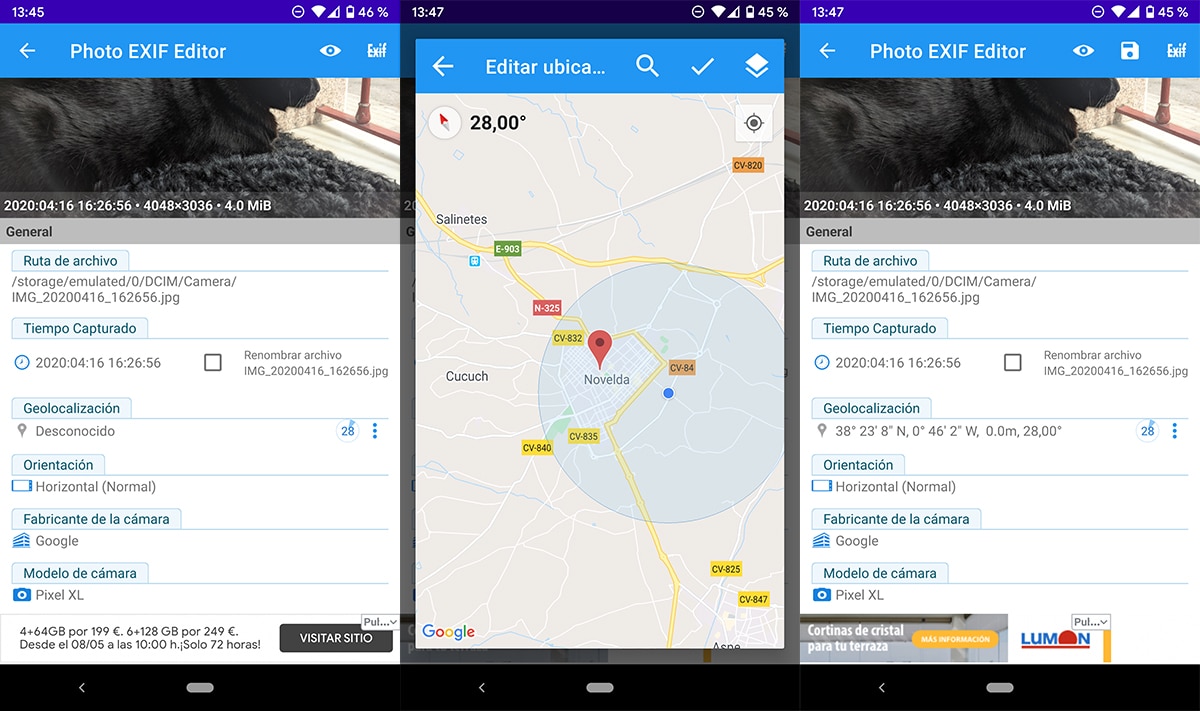
- First of all, once we open the application, we must click on Explore and find the photo to which we want to add the EXIF data.
- Next, an editor will open where we can modify all the data we want. In our case, we click on Geolocation.
- Next, a map will be shown where we have to establish the approximate location of the photograph. Once the pin with the location is located, click on the validation icon and then save through the icon that is shown in the same position.
- Once we have saved the image with the location, the EXIF data of the photo will be displayed again with the location we have selected.


