
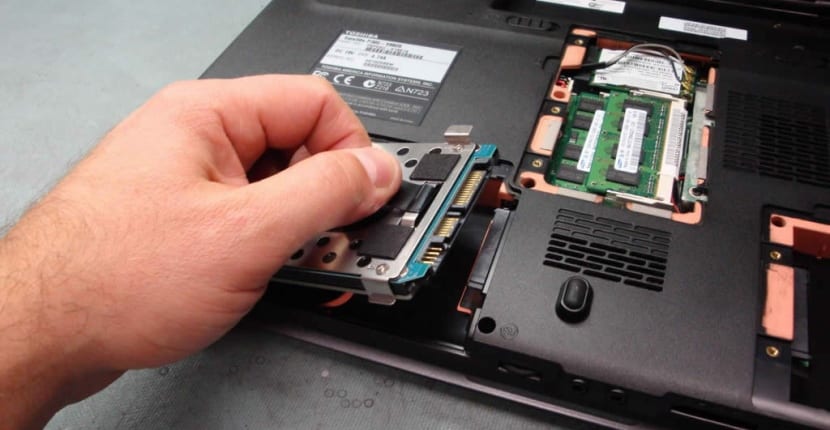
If you have ever had to update your computer with a new component such as a higher capacity hard drive, something that can be as simple a task as removing two screws and putting them back, can be much more complicated than we imagine if we have We have to reinstall and dump all the contents of the old hard drive to the new one we want to install.
The truth is that in this post I want to show you different ways to make this work much easier and above all automatic. The truth is that, for example, Windows reduces this problem as the operating system itself evolves and advances, although, again and in this specific case, it all depends a lot on the age of the hardware itself with which the machine with which we are working has been equipped.
As stated in the title, before having to reinstall all kinds of drivers or having to reapply the user's own configuration, I suggest that we make a hard drive cloning that we are currently using and we install it on our new hard disk, something that saves us a lot of work 'at a stroke' since it will allow us to keep an operating system with its updated registry and even our user programs and own configuration. Once we have a copy of our hard drive with this technique, we can dump it on any computer and work on it as if it were our own.
Why clone the hard drive and not use another technique?
At this point, surely you are wondering why you should clone your hard drive and not use any other method. The reason for making this perfect copy of our current hard drive can have several reasons, on the one hand we can get a perfect copy of our hard drive that we can store, for example, on an external hard drive to serve as a backup in case our main hard drive fails and we must continue working with some urgency.
On the other hand, it is the perfect form of power carry our information from one computer to another without having to reinstall everything cleanly. This is something that, although it seems that it is not interesting, is much more than you imagine, especially if you intend, as we have already mentioned, to update your machine with a higher capacity hard disk or if we want to install a new SSD disk, a unit that significantly improves the performance of our computer thanks to the fact that, as you surely know, this type of technology offers a fairly high increase in performance since it offers much higher read and write speeds.
Finally, and it is something that personally has been very useful to me on occasion, it allows you, for example, have exactly the same operating system on two totally different computers, in my case two different desktop computers. This allows you to have the same operating system, the same programs, the same user data, the same configuration… on two completely different machines.
Prerequisites for cloning the hard drive
Before talking about what we must install or what we must configure to be able to proceed with the cloning of our hard drive we must take into account two things, we need a clone program and, secondly, a totally clean hard drive It must be connected to the computer since it will be in this unit where we will copy all the information.
The latter also has its drawbacks, that is, we need a hard drive that must have the same or even greater capacity than the starting hard disk. Once we are clear about all these previous points, we will go on to detail how to clone our hard drive depending on the operating system we are using at all times.
Clone a hard drive in Windows 10
To clone your hard drive in Windwos 10 you will need, as we have already mentioned in previous lines, to have your new hard drive connected to your motherboard. Once you have done this step, you must download AOMEI Partition Assistant. At this point, it should be noted that there are many tools to clone a hard drive, I have personally chosen this one because you can use it without having to log in from a pendrive, cd or similar.
In addition to the above, something that makes this process a much simpler and above all interesting method, the tool allows us to perform different types of cloning since you can create a perfect copy of it, including partitions and others, or just copy the partition where you have Windows installed.
To start cloning your hard drive, we open the AOMEI Partition Assistant program. Once the program is running, we go to the side menu and click on the '' sectionPartition copy'. With this action we get the copy wizard to start, where you will have to mark the option 'Quick disk copy'to click on'Next'. At this point, only select the partition we want to clone and continue with the process. Finally, we only have to choose the disk or partition of the same where the copy will be dumped.

As a final note, it should be noted that this software offers the possibility of adjusting the size of the partition where you want to dump the clone. To do this you just have to check the option of 'Edit partitions'and modify the size of it using the sliders. When you have the desired size configured, just click on 'Next'and click on'Finalize'. With these steps you will see that there is now a new task in the 'sectionPending operations'. If all the configuration is correct and is what you want, you just have to click on 'Apply'to end with'Proceed'.
The next step is for the computer to restart completely automatically, so you should not panic or worry at this point. Once you start, you will realize that the machine automatically starts the cloning software that will start working on it. While the whole process lasts, do not touch anything or turn off the computer, just let the application finish working.
Clone a hard drive in Ubuntu

Ubuntu is one of the most versatile operating systems at the moment, especially thanks to the huge community behind it where any user can always offer you a new idea of how to perform different actions, some are more complex, others faster to perform but all of them are usually just as valid and interesting.
A clear example of what I say we have it in the form that I have been able to find of how to clone a hard disk in Ubuntu where there are users who use the dd application, which is usually installed in the basic configuration of the operating system, while others, in case they want to copy the entire hard drive as it is, usually opt for another type of action.
If what you want is not to complicate yourself since you need an exact copy of the hard drive that you have mounted on your computer, all you have to do is connect your new hard drive, remember that it must be of the same capacity or greater than the one we already have installed and we want to copy. Once this action has been carried out, we start the computer from a pendrive where we have Ubuntu installed.
Once we have started the computer, we only have to open the terminal and from the command line execute a command as simple as:
cp /dev/sdUnidad1 /dev/sdUnidad2
In this case we must replace the literal Unit1 with the source unit, that is, the unit that we want to copy and Unit2 with the letter of the new unit, that is, the new hard disk that we have installed in the system, the unit in the we want to save the copy. In this simple way Unit2 will be a clone of Unit1.
Another option, as I said, is use the dd program. To know if we have it installed, we just have to execute the order
$whereis dd
If we have it installed, we should get a result similar to / bin / dd. Once this simple check is done we must know exactly where you are and especially what hard drives and partitions you have, for this we execute
$sudo fdisk -l
This order will only offer us information about the hard drives that we have installed and their partitions. What we will see in the terminal is a kind of list with the name of the hard disk assigned by the operating system to continue with its possible partitions. Once the names assigned for the starting hard disk and the new one on which we want to dump the data have been located, we execute
$sudo dd if=/dev/sdUnidad1 of=/dev/sdUnidad2
This command has a very simple explanation, if it means that input file, that is, the source hard disk, while of means output files. As in the previous order, we must replace the literal Unit1 with the name assigned to the hard disk that has all the data, while Unit2 must be substituted by the literal assigned to the hard disk where you want to save the copy.
Finally, if we run again
$sudo fdisk -l
you can enjoy check for yourself that the hard disk Drive2 is exactly the same as Drive1.
Clone a hard drive in MacOS
In the case of an Apple computer, the truth is that cloning a hard drive is very simple. First of all, as in the previous ones, we must connect our new unit to the machine. Once connected, we just have to open the disk cloning utility, which you can find inside the Applications folder, specifically in Profit Share.
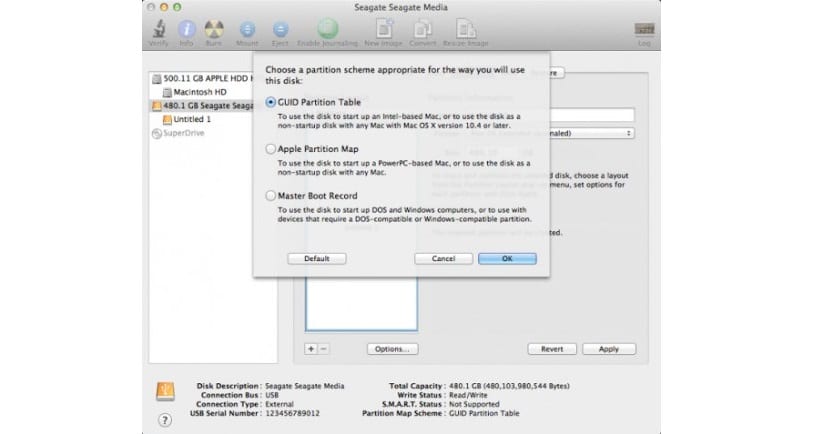
Once this utility is open, we click on our hard drive and select the Partitions tab. In this section we will go to the Partition Layout field and select '1 partition'. Right at the end of the screen there is a field called Options where we must access and go to 'GUID partition table'. In this section you will only have to verify the permissions of your hard drive and click on 'Repair disk permissions'. Finally just click on 'Check disk'.
Once you have carried out all these steps, we restart the computer by pressing the Option key. Once the system is booted on the Recovery disk. Once the system has started, click on the option to Reinstall macOS and select the destination disk. This whole reinstallation process it will take about 30 minutes. Finally, when all this process has finished the system will ask us if we want restore files from another diskAt this point we must select the old one since in this way all your personal files will be copied from the old hard drive to the new one.