
The first thing and before starting with the tutorial how to use AirDrop from our iOS and macOS devices, is to be clear about what AirDrop is and what it is for. In this case the explanation is very simple and for everyone to understand it is like transferring files or data from one device to another as if we were doing it via Bluetooth but much faster.
It is important to be clear about what we can send using this Apple technology called AirDrop, so we have to clarify that they can be sent documents, photos, videos, websites, map locations, etc., wirelessly to an iPhone, iPad, iPod touch, or Mac as long as they are close to each other.
We have to be clear that this technology only available for Apple devices and we cannot use AirDrop to pass our photos, documents, links or the like with other devices. This may be very obvious but it needs to be clarified for those arriving now as new iOS and macOS users.
How to share content with AirDrop on iOS
To start with the best-selling Apple products we will start with iOS and how to share any type of content with AirDrop. What we have to do if we have an iPhone, iPad or iPod Touch and we need to transfer one or several files at the same time to another iOS device is follow these steps:
- The first thing is to open a photo, document, app, or similar and find the content that we want to share with another device. To share several elements at the same time, what we have to do is click on Select and then choose more than one of the documents, photos or files that we want to share. With iOS 10 and later versions we can also share any type of links in apps with AirDrop and for this we press and hold the app icon on the home screen.
- Press Share or directly on the icon with a square shape and an up arrow

- Now we click on the AirDrop user with whom we want to share content that must have the device near ours and with the corresponding activation to receive content from AirDrop. To do this we can follow the following steps if we do not see the user with whom we want to share the file using AirDrop


What if we can't see the other device?
This can happen in all cases and is that the device to which we want to send the document in particular do not have the option to receive data via AirDrop enabled. For this, in the case of having a device with iOS we have to carry out the following checks:
- The first thing is to see that the two devices have Wi-Fi and Bluetooth activated.
- With the option "Share Internet" this method of transferring documents does not work, so we have to have it disabled
- Make sure that the person you want to send it to is nearby, we cannot send content to users who are outside the Bluetooth or Wi-Fi reception range
- If the other person has AirDrop reception settings configured in Contacts Only, and we do not appear in their contact list, nothing can happen. At least we have to have our Apple ID on your contact card for AirDrop to work if we don't want all users to be able to send or receive our data.
- To receive and send data to the whole world within our Wi-Fi or Bluetooth coverage we have to set AirDrop reception to "All". Now all users can send and receive documents, photos, links and more using this method.
We can configure all this to our liking by accessing from the iPhone, iPad or iPod Touch to: Settings> General> AirDrop. From this place we can adjust the receive setting on or off, that we can only transfer to our contacts and finally that it is possible to everyone.
- Receive disabled: You will not receive AirDrop requests
- Contacts only: only your contacts can see the device
- Everyone - All nearby iOS devices using AirDrop will be able to see your device
Do you arrive without accepting anything? How we receive content with AirDrop
Well, in order to receive or send content we have to follow some previous steps that are those marked above, but also for those who receive the content we have to accept those files from our device. So it is not enough to send it, we have to accept it. This has a clear exception and it is when we ourselves want to transfer a photo, document or similar from iPhone to iPad or Mac. In these cases, having the same Apple ID is what means that we do not need to accept or reject the transfer of that document .
When someone shares any type of document with us through AirDrop, an alert will sound and appear on our device with a preview of the content. This will serve to accept or decline its receipt. This is really useful when we are in crowded places and we have the "All" option activated since we prevent any document from reaching us directly without our consent to the iPhone, iPad, iPod Touch or Mac.
Once the document is accepted, it is stored in the right place and we do not have to do anything else. In the case of sending a link, this is automatically added to the Safari browser, a photo in the Photos app, an app will open the App Store and thus with all the files we receive.
The Mac is basically the same as on iOS
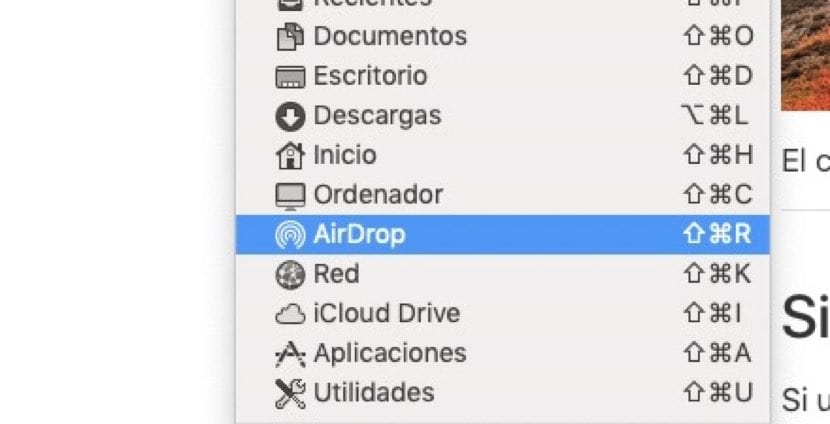
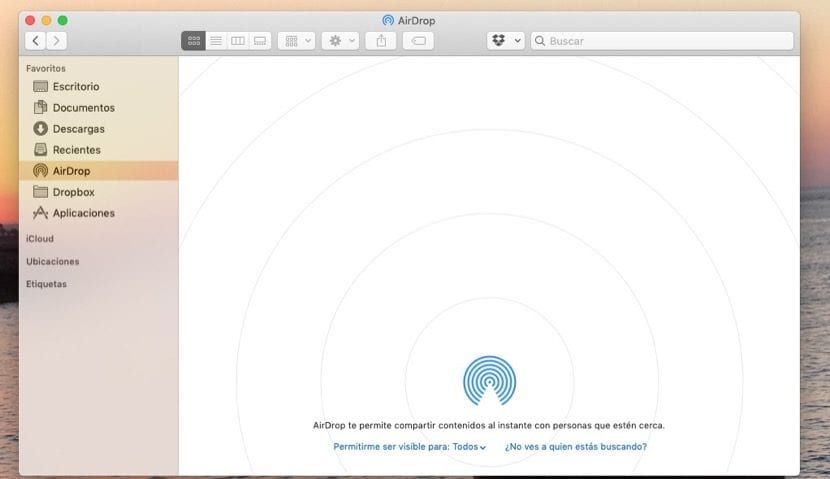
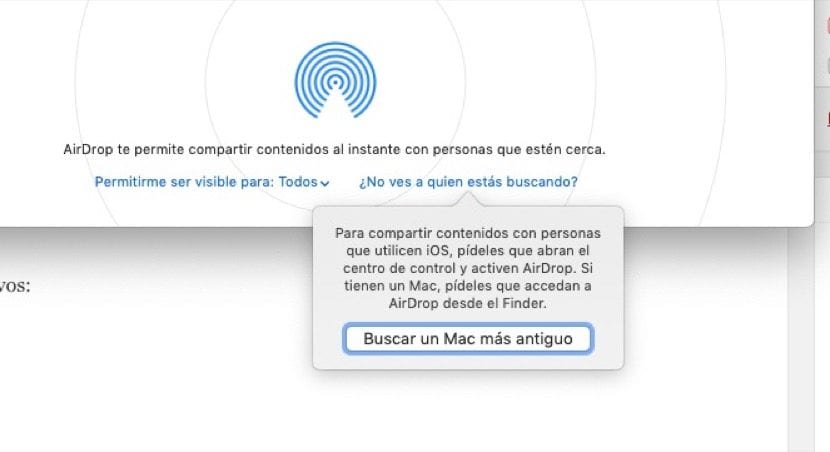
If we have a Mac and we want to use this file transfer method, it is really fast and easy to use. As with iOS we have to make sure that our Mac is ready to receive content and for this we have to enter from Finder> AirDrop. At the bottom we will see two options that we can click in blue: Allow me to be visible to: Everyone and Can't you see who you are looking for? When we click on the second option, a dialog box appears that tells us to notify the other person to activate AirDrop from the Finder in case it is an old Mac or similar. If, on the other hand, we have the option to "Allow myself to be visible to: Nobody", then we change it and that's it.

Requirements to be able to send and receive using AirDrop
To share content between a Mac and an iPhone, iPad or iPod touch, you need any of these devices and operating systems:
- Mac 2012 or later (except Mac Pro from mid-2012) with OS X Yosemite or later
- iPhone, iPad or iPod touch with iOS 7 or later
To share content between Mac computers, both computers must be one of these models:
- MacBook Pro Late 2008 or later, except MacBook Pro (17-inch, Late 2008)
- MacBook Air from late 2010 or later
- Late 2008 MacBook or later, except white MacBook Pro (Late 2008)
- iMac from early 2009 or later
- Mac mini from mid-2010 or later
- Mac Pro from early 2009 (model with AirPort Extreme card) or mid-2010
- iMac Pro (all models)
Remember that on Macs it is the same when we have the "Internet Sharing" option activated, and this method of transferring documents will not work.