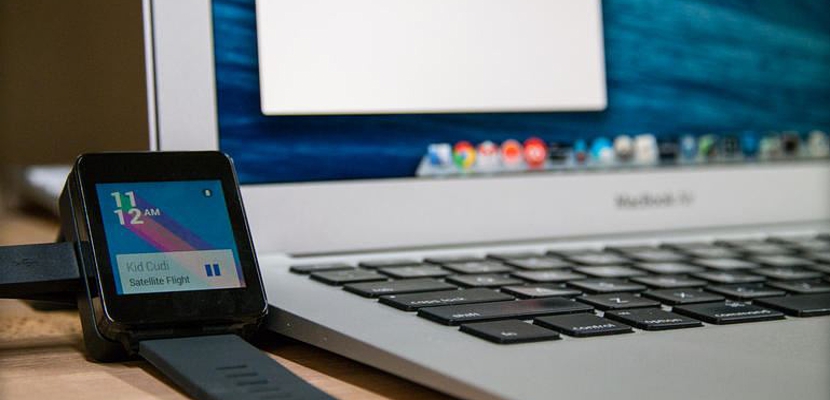
During the execution of the Google IO, a lot of excellent news was presented in favor of the entire community that somehow has an Android mobile device in its hands; one of them made mention of your smartwatch with Android Wear, same that keeps interesting characteristics once it has been synchronized with one of our mobile phones.
About the characteristics of this Google Android Wear SmartWatch, a lot has already been said in different types of blogs on the net, something that has come to amaze and amaze us at the same time, because we will not need to extract the mobile phone to check messages or make phone calls (among many other tasks). Now, if on an Android mobile device (tablet or mobile phone) you can easily take screenshots, Can a capture be made on these smart watches with Android Wear? If you follow the reading we will tell you how to carry out this task in the remainder of this article.
Take screenshots on Android Wear?
Anyone might think that if we have a mobile device in our hands, it is only a matter of pressing a few buttons to take a screenshot; Although it is true that this task can be performed in a very easy and simple way on the tablet or on Android mobile phones (and obviously, on an iPad or an iPhone with their respective variants), the same situation would not be possible to be performed in these smart watches with Android Wear natively, although if we use a few tricks, we could make any type of screenshots of what we are reviewing at a certain time in these accessories.
As we suggested in the previous paragraph, natively is practically impossible take a screenshot on an Android Wear, therefore trying to support us in a few applications that have been distributed to the developers of the platform, and that right now we will use them with a few tricks to follow.
First of all, you must go to the following link, which will direct you to the Android developers website; there you will have to download the SDK to install it on your Windows computer, although if you are going to work on Mac you should look for the respective version of the section shown a little further down.
Once we have downloaded and installed the Android SDK on our Windows computer (or one with Mac), we will be ready to try to achieve our goal; previously, you must enter your Android Wear settings to have whate activate Developer Mode on Your Watch.
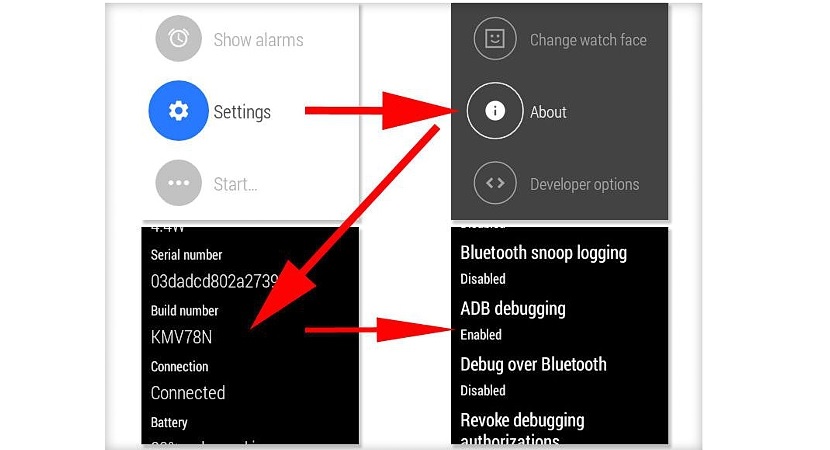
The image that we put in the upper part is a small sample of what you will have to do in order to activate this mode on your Android Wear watch; There is a little trick that you must perform during this process, something that we will explain to you in a few steps below:
- First, enter the settings of your Android Wear watch.
- You choose the option «About«.
- A few options will pop up immediately.
- You must "Hit" (touch) about 7 times in a row in the version number until the following window appears.
- There you should Activate ADB Debug Mode.
Once you have managed to activate this mode, you will have the opportunity to start take screenshots of your Android Wear watch but from the Windows computer. To do this, you have to connect it through the USB cable and enter a few ADB commands from here, without a little suggestion the following:
adb shell screencap -p /sdcard/screenshot.png
The capture will be saved on your watch, which you can later send to the computer with the following command:
adb pull /sdcard/screenshot.png
Although it seems a very complicated method to follow, but everything is a matter of a little time and patience; without a doubt that this type of tips and tricks will be very helpful for those who are dedicated to doing tutorials in their respective blogs, this to support the captures of images as we have suggested using these methods.