Now let's continue with the Tutorial: Batch work with the Adobe suite, in its 3rd part, where we will begin to develop the action that will automate the work with the photos, making our professional life more comfortable.
To be able to combine the different Adobe, It will bring us a more effective workflow, achieving more comfort and better results than if you worked with one of them alone. For example, Adobe Photoshop is a great image editing program, however it is not a good element organizer, how hes Adobe Bridge. Without more I leave you with him tutorial.
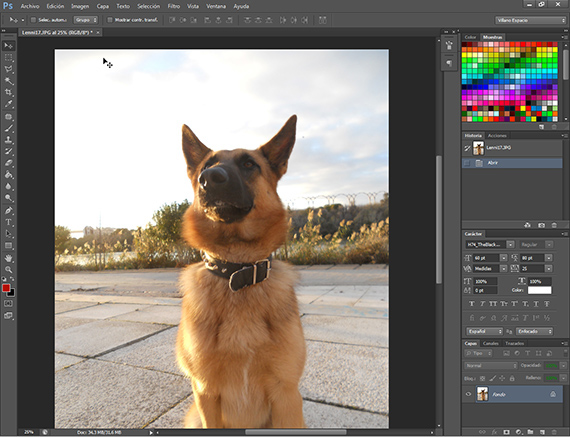
Well, taking up what we left in the previous one tutorialWe had ordered the photos of the session that we liked the most, taking about 26 from a group of 51, and these 26 chosen were separated into two groups, which we will work differently, and therefore we will do different actions to be able to work in batches. If you have any questions, you can consult our Tutorial whenever you want: Work by batch with the Adobe suite (2nd part).
Treatment to the photo
As we explained in the previous tutorial We are going to start a series of treatments to the photo that we have taken to do the tests that will lead us to schedule an action for the group of photos chosen. Once I have finished doing tests, and thinking about what I want to achieve with these photos, I decide to make a retching of color and light, correcting the levels given to the photo by the camera we have used, which depending on one camera or another will leave us some levels or others. First we will apply the edit to the photo and then create the action. First of all you must have paper and pencil handy to be able to write down the tools and the values that you are going to give along with the work that has been developed in order to be able to program exactly the same action that we are going to develop.
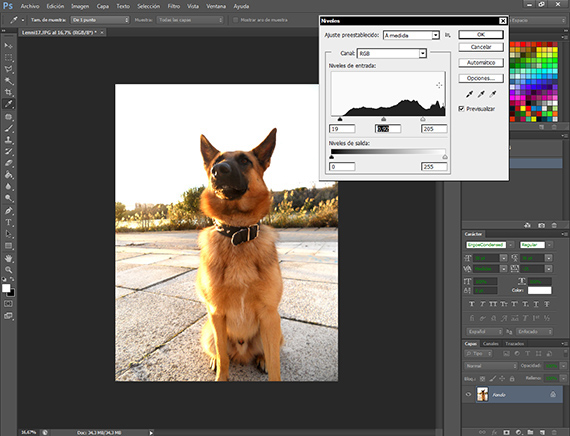
Level Correction
The first treatment that I have applied is a correction of the light levels, entering the route Image-Adjustments-Levels. This tool is very easy to use, and allows us to correct the general light levels of the image, allowing us to correct the blacks, whites and grays of the photo in a quick and practical way. As with all tools Photoshop, you have to be very careful with how it is applied, as it can lead us to over-process the photo, which we do not want. Never. We write down the values on the paper we have for it.
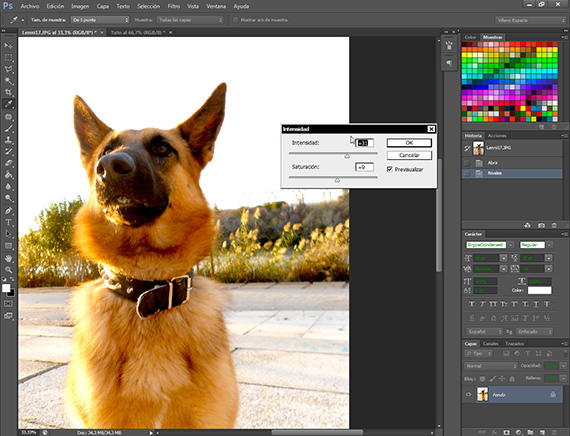
Giving intensity
The intensity option is on the route Image-Adjustments-Intensity, and we are going to use it to highlight the color levels of our image of kilogram. With this tool it is easy to go overboard, so we must be very careful when using it. We will apply values not higher than 40 taking into account the aforementioned. Do not pass. Write down the tool's values on a piece of paper.
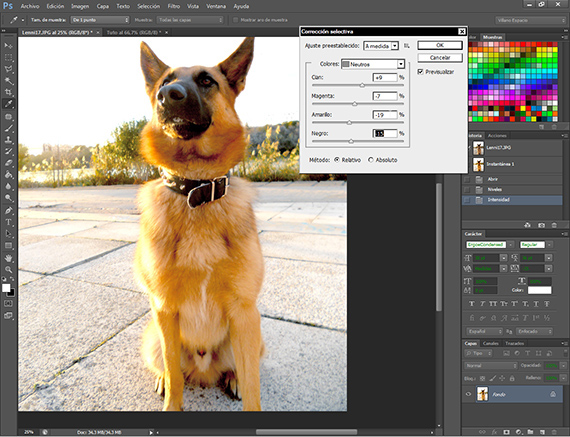
Correcting colors
On a route Image-Adjustments-Selective correction, we have a very versatile tool for Photoshop, which helps us to balance the colors of the images, equalizing or balancing them. We are going to use it to remove that touch of yellow from the whites and neutral colors that is so ugly in the photo, giving a more natural look to the photo. Another tool with which we must be tactful and patient or we will over-process our images. Write down the values.
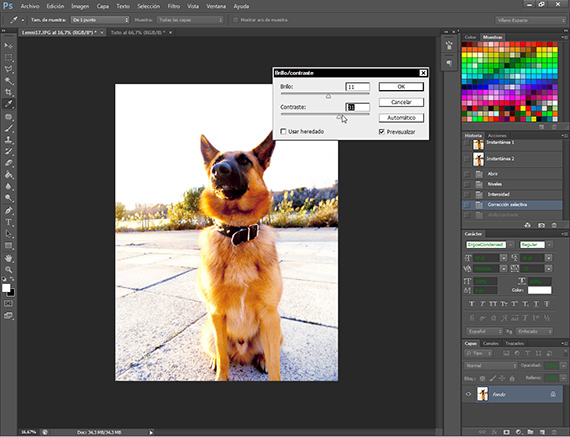
Contrast
Using this tool found on the path Image-Adjustments-Brightness and Contrast, we will give more light to the photo and a little more contrast, in order to illuminate the scene and that the vivid colors of the hair of kilogram stand out. Write down the values.

Judge for yourself
Once I have finished applying the different treatments, judge if that is the result you want, not only for this photo, but for the rest of the series. It is very important to be patient and know what you want for your work.
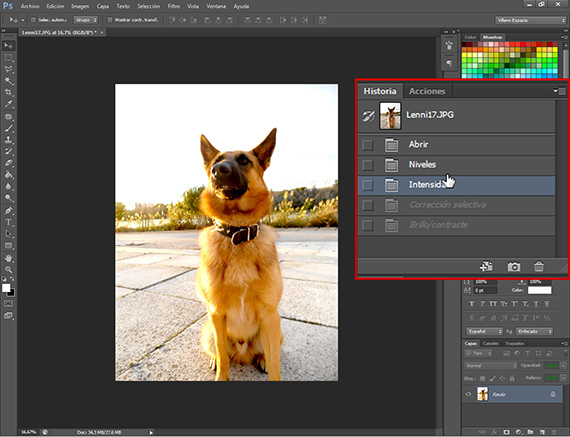
Decision taken
Once we are convinced that this is the touch-up we want, we go to the window History and we return the photo to Home, that is, how it was when we opened it.
We start to program the action
We finish this part of tutorial, collecting the data obtained from our work with this photo, the annotations on the paper. Scheduling an action is easy, however you have to follow a few steps in order to include it in a flow of work by lot, without getting out of what we want. To do this, we will write down the order and values that the treatment of the photo that we took as an example has given us on a piece of paper.
In the next tutorial we will fully schedule the action and begin batch job preparation of a group of photos.
More information - Tutorial: Batch work with the Adobe suite (2nd part).