Un professional photographer, He must face the different challenges that his profession puts before him on a daily basis. These challenges often involve the repetition of one or more treatments to groups of hundreds or thousands of photos (make an online store and you will see what I am talking about), which can lead to many wasted hours and major failures if you do not know how to use the technology in a logical way. Well for that this tutorial.
Today's technology has meant that the knowledge of any of the profiles that you name in the previous paragraph have seen the characteristics of their professions changed, which has made them have to learn new skills in order to develop their work. For a photographer Nowadays, it is much more necessary to know how to handle a photography editing and organization program, than to know how to use a dark room. That is why I bring you today the Tutorial: Batch work with the Adobe suite (Part I) .
Today, a digital camera It can shoot hundreds of photos, where before one had to go loaded with a thousand reels, today it is enough to carry a couple of 32GB cards, which take up half the space and are twice as effective. Knowing how to use a film is in our time an anachronism, since almost no camera has the possibility of inserting a film. In a previous post we saw the Tips for Street Photography where I leave you some good advice on how to do pictures on the street.
This entry is the beginning of a series of tutorials where I will teach you to have a logical workflow, using two of the programs in the Suites de Adobe as they are Bridge (a very powerful image organizer) and Photoshop (the image editing program par excellence) to obtain the best result in the shortest time, when making an image treatment to a group of photographs.
In this case I am going to use a photo session I did for a client about her dog, a German Shepherd named kilogram which turned out to be a great model. We start from the premise that the session has been downloaded into a folder for itself and that it has the name of kilo. To run this tutorial You will only need to have the Adobe CS6 Suite installed (minimum, although most of the options are found in all previous versions.) I leave you a folder with the photos of kilogram in a link , at the end of the tutorial.
The objective of this tutorial, is to give a good presentation to the photoshoot of kilogram, with photos named, edited and retouched, and invest the minimum of time in this company to earn more money per hour of work, and all this always complying with the Photoshop Etiquette. I am sure you will be with me in that it is a goal.
Order above all
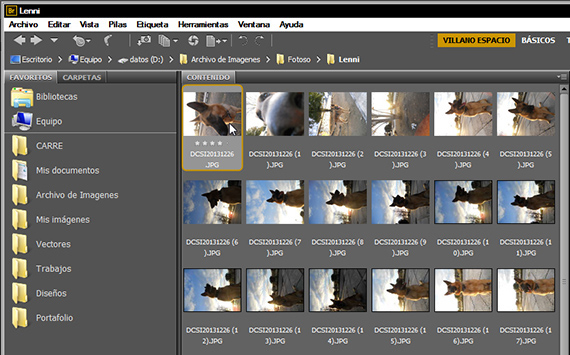
Let's start by sorting the folder kilogram, since we must view before deciding which treatment we are going to execute on the photos as a group (not individually, since if we decide to give a different retouch to each photo, we should execute another type of flow flow technique work when it comes to optimizing the relationship between quality of work, time invested and money earned. To view the photos we will open Adobe Bridge, place that we will use to view, choose, straighten (if necessary), metadata and tag our work.

Rename easily
Working with the name that the camera gives to the photo, apart from being somewhat sad, is not very practical, since the complicated names will make it more difficult for us to choose. To rename all the photos of the pull, all the photos are chosen (Ctrl + alt) and then we go to the option Tools and we choose the option Change Name in Land.

A dialog box will open, which will have several options, in order to name and number the photos with various options, including date, name, even milliseconds. We can save the naming option that we want to be able to execute it in other jobs, or even have several saved. We are going to choose an option that gives us the name of kilogram for then a serial number. Once we have all the renamed images, we begin to choose and straighten the ones that are crooked, whether or not to rate the ones we like the most with the star system or to separate them by groups depending on their importance or if any modification is necessary.

Pick and Straighten
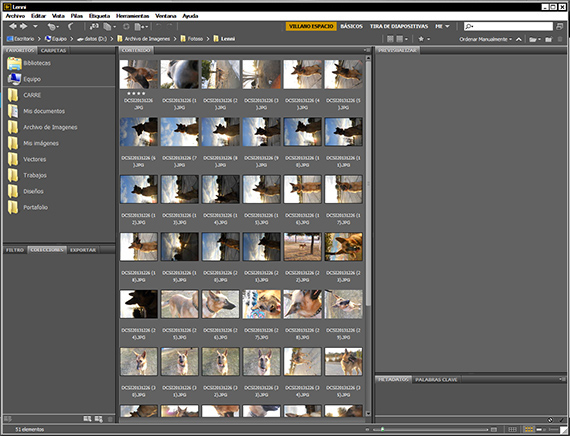
We are going to choose the photos that we like the most and we are going to give them a rating with the stars. This will help us to then be able to locate them quickly through the option that the program enables for it. We are also going to straighten them so as not to do it in Photoshop, since doing that action in the editing program would waste time and would not enter the comfort of a flow of work logical.
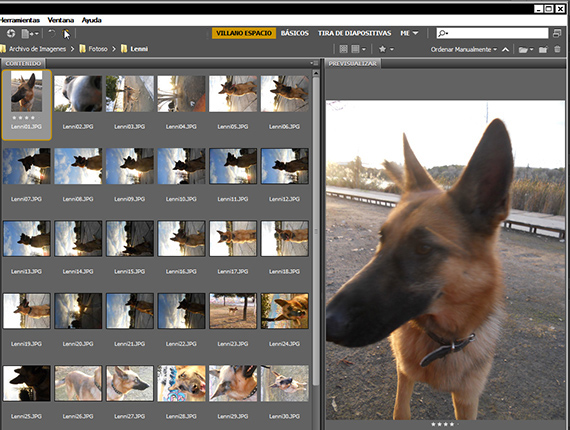
Adobe Bridge It offers us the possibility of labeling the photos using a scoring system and another one of labeling by colors, which are very useful in order to be able to differentiate between the different photos of the same session, among many other utilities. We will move on after choosing the ones that look good, labeling and straightening the ones that need it, to group them by groups according to the needs of each group of photos. After using Bridge We will sort them by folders.
With this task already done we will move on to Adobe Photoshop in the next tutorial.
More information - Tips for Street Photography