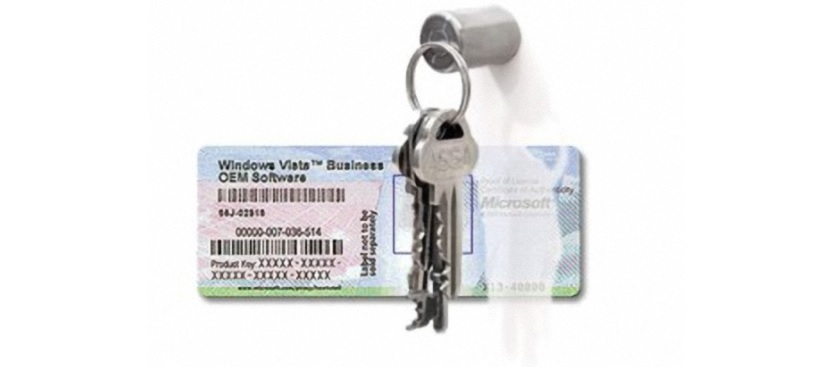
The serial number that is used to legally install Microsoft Office and each of its modules, usually consists of a few characters that for many people, it is annoying to have to type in the respective space.
Imagine if this task had to be carried out by a person who manages a large number of personal computers, because all of them will have to install Microsoft Office with the same serial number. There are a few tricks that we could use so that the serial number is registered automatically and therefore, we do not require its use when installing this office suite on the personal computer.
Because reason avoid writing to Microsoft Office serial number
We have already mentioned one of the reasons at the top, being able to mention a different one that many people find themselves with at any given time. The serial number is usually printed on the package box and at the same time, it could be stuck somewhere on the case of the personal computer. With the passing of time, this serial number may become unreadable, which would practically make it impossible for us to have to carry out the installation process efficiently.
The tricks that we will mention below require the user to absolutely copy all the files and folders from the CD-ROM drive that this Microsoft Office has, to somewhere on the hard disk; A more suitable way that we could also recommend, is to try to transfer all the content of this installer in the CD-ROM (absolutely all inside) to a USB pendrive with some of the many tools that we have mentioned in this blog. Once there, the files that we will need to manipulate can now be easily "Editable"
Work with Microsoft Office XP or 2003
If we have proceeded in the manner suggested above then we already have the possibility to search and find a few elements that will help us to carry out this task; for this specific version of the office suite, the user must navigate to the folder:
Files -> Setup
Once there you will find a file called "Setup.ini" and to which, you have to select it with the right button of the mouse to choose its «Properties»; from there, you have to remove the mark that will say "read only" so that we can carry out any type of modification.
Now we only have to open the file using the "Notepad", and then have to go to the "options" section. Next we will place a small screenshot that practically tells you what you should do.

As you can see, there has been inserted a line with "PIDKEY = ABCDEFGHIJKLMNOPQRSTUVWXY", where the value has to be replaced with your respective serial number and without including the "hyphens" (-); When you save the document, you can run the installation and you will notice that you will not be asked to type the serial number.
Work with Office versions 2007, 2010, or 0
Higher versions of Microsoft Office have to be treated in a completely different way than what we mentioned in the previous alternative; This is because the folder where the file to be edited is located is different, which will depend on the version number of the office suite that we have. If we have extracted content to a folder on the hard drive or in the best of cases, we have transferred it to a USB pendrive, we must navigate inside to find a directory very similar to the following:
- ProPlusr.WW
- Standard.WW
- Pro.WW
- HomeStudentr.WW
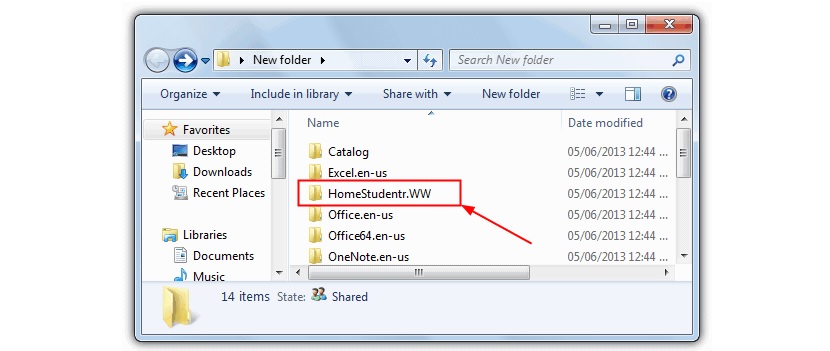
Actually, the folder we need for now should have a "WW" ending, so it is easy to locate. Inside of it exists a file named "config.xml", to which we will have to open it with the "Notepad" as we did in the previous method.
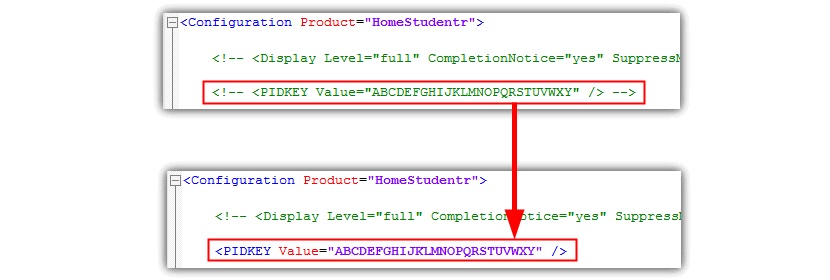
According to the screenshot that we have placed in the upper part, you only have to find the place where a line with the serial number is already pre-established, although, as a «comments»; to remove this feature, we will only have to delete what is found before « and obviously, modify the other characters by the serial number that belongs to your office suite. Pay special attention to the screenshot that we have placed above, because there is the "before and after" of everything you should do.