We had previously suggested the use of a tool that has the name of WinSetupFromUSB, same that we treat it in a very light way and that nevertheless, it is worth explaining, that its use goes beyond what we could imagine. In this article we will try to make all the installer files of Windows XP, Windows 7 and Windows 8 present on a USB stick, although if the user wishes, the latter could be replaced by the latest update offered by Microsoft given its benefits to the user.
Leaning on WinSetupFromUSB, what we will get is a a USB flash drive with bootable features that we can insert into the respective port to start our equipment with the device. Under this working environment, the user will have the possibility to choose which operating system they want to install on the computer as far as Windows is concerned.
Basic considerations for working with WinSetupFromUSB
Of course, if the user wants to use this pendrive with a different operating system, it could well replace any of the previously suggested ones. for some version of Linux; We have wanted to use the 3 operating systems that we mentioned above due to the difficulty that this could cause the user when he wants to perform this task; The basic requirements that will be needed before starting to work with WinSetupFromUSB are the following:
- A pendrive of 8 GB onwards, being recommended one of 16 or 32 GB.
- The Windows XP ISO image.
- The Windows 7 ISO image.
- The Windows 8 or Windows 8.1 ISO image.
- An application that helps us mount ISO images.
Without a doubt, we will have already analyzed each of these requirements in order to acquire them; When talking about the ISO image of the different operating systems, we are referring to the installation CD-ROM or DVD disks converted to ISO. Now it only remains to have to run the tool and begin to recognize each of its elements to work.
Steps to create our Multi-OS USB pendrive with WinSetupFromUSB
To make everything more fun, below we will mention the development of the steps that we will have to follow but sequentially and with different screenshots.
- We insert our USB pendrive in the respective port of the computer.
- We mount the ISO image of Windows XP.
- We run WinSetupFromUSB.
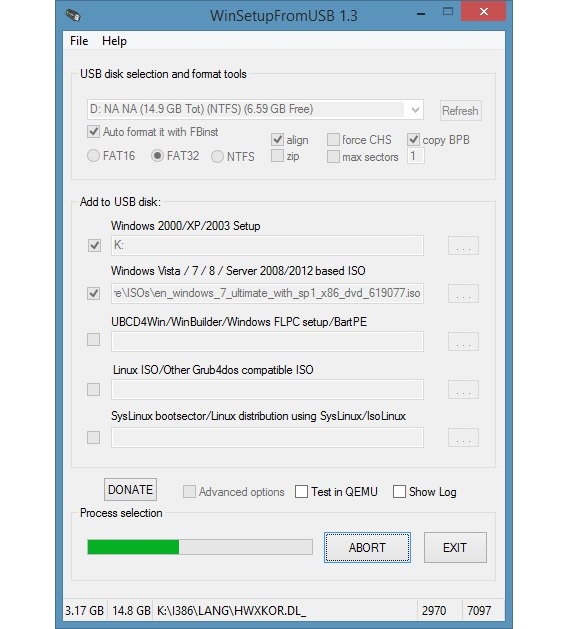
- We activate the first box that refers to Windows 2000 ... and we define the drive where the Windows XP image is mounted (in our example "K:")

We are going to make a short stop at this point to explain what we have done; The first box that we have activated will collect the most important boot files and all those that are needed to install Windows XP, something that will help our USB pendrive to be recognized as a boot device from the moment we turn on the computer.

Do not forget to check the boxes as shown in the image, and you should also consider that your USB flash drive will be formatted and with this, all your information will be lost once the process has started.
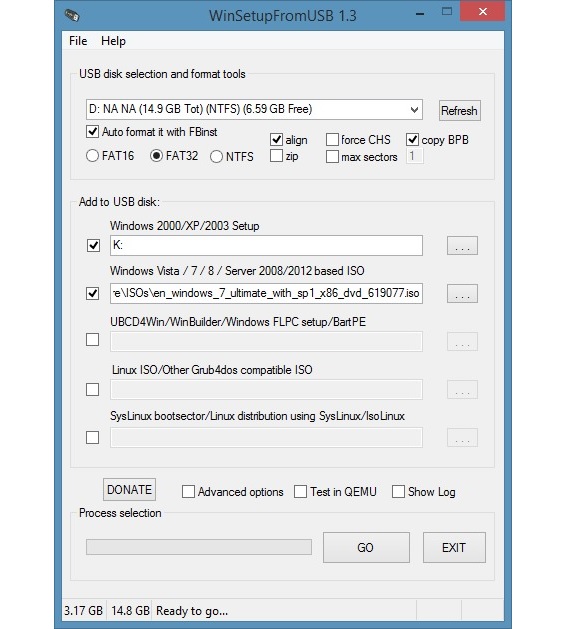
- We activate the 2nd box and look for the place where the Windows 7 ISO disk image is located.
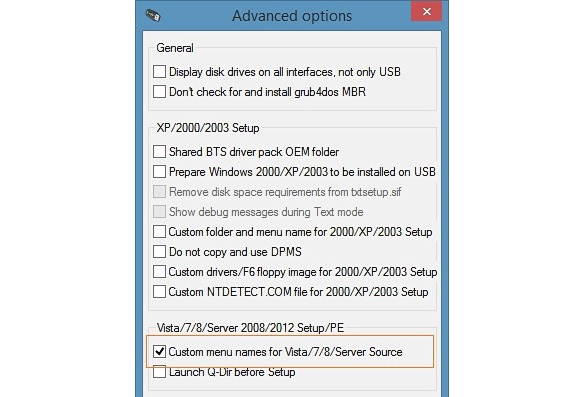
- We activate the box «Advanced Options»Located at the bottom of the window.
- We activate the box that you can admire in the following image.
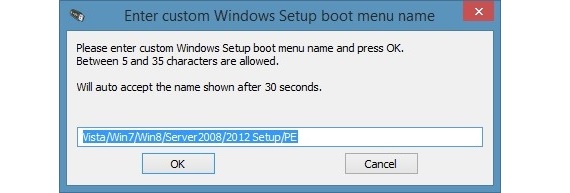
- We click on GO and then on YES.
- The software will ask us for a name for the boot of our USB pendrive, and we must place whatever we want.
After having executed the aforementioned steps, WinSetupFromUSB will start the process, which will take some time since we are at the moment, processing the operating systems so that they are collected on a single USB pendrive.
What we have said at this time is something very important to take into account, since once all this work is finished, We will have both Windows XP and Windows 7 in the USB pendrive, missing what we have promised in the beginning, that is, Windows 8 (or Windows 8.1 given its immense benefits).

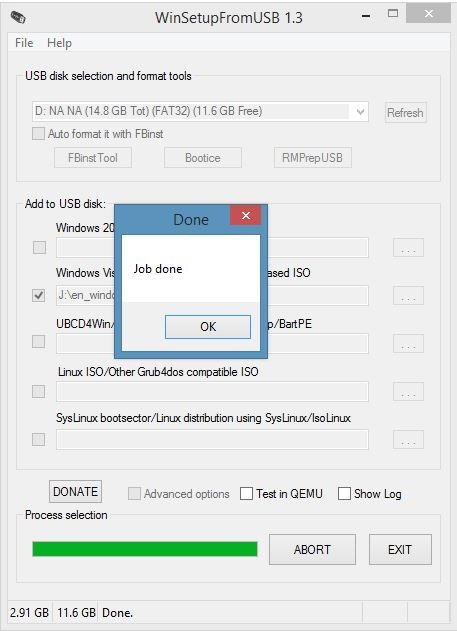
When the process finishes a small window will appear with the message «Job done »(work done). We click OK but we do not close the WinSetupFromUSB application since we still need to integrate the latest operating system that we mentioned above.
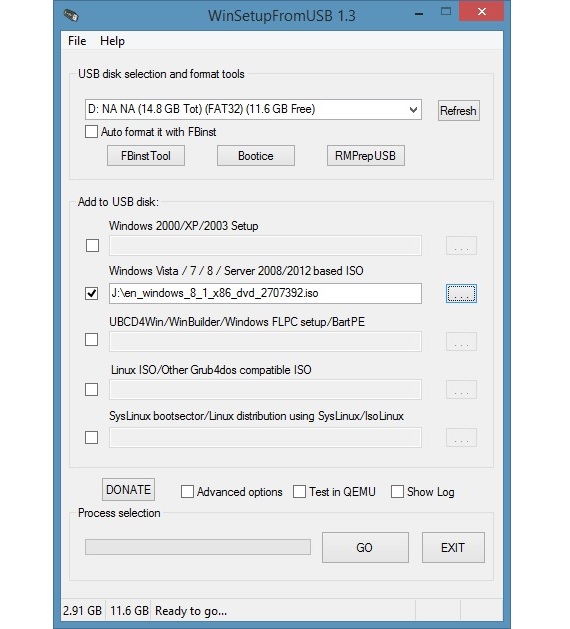
The window that we have placed previously is what we should do as the last part of the process; this means that we will only need to activate the 2nd box (the one in which Windows 8 is mentioned), having to later look for the place where the respective ISO disk image is located.
Again we will have to do click on the «GO» button to continue the process with this last step, At the end it will show the small window with the message "Job Done" again, so that our USB pendrive will have the 3 operating systems in its environment or rather, their installers.
When you insert the USB pendrive into the respective port of the computer and turn it on at the same time, the device will be recognized as a boot accessory with the menu of the operating systems that we have integrated into it. It is worth mentioning that the user should configure computer BIOS To make the same, recognize the USB pendrive as the first boot device.
More information - Build a multi-boot USB stick with WinSetupFromUSB, Revive our old computers by installing Linux, Gburner Virtual Drive - Create multiple virtual drives on your pc, Creating an ISO image from a physical disk, The 10 best features you'll appreciate in Windows 8.1, Interesting aspects that you should know about Windows 8.1
Excellent, we are going to do the process, because there are many teams that worked with XP and it will be great to be able to use them again. Thanks
Thanks for your comment Juan. Well yes, there are still computers with Win XP. Good luck and thanks for your visit.