Windows 8.1 comes with a lot of new features and where, its start screen can now be personalized according to every taste and style of any user. The Live Tile (or live tile) is one of the features that we may come to admire in these elements, something that could be good or bad depending on the need we have for said information.
If the tile refers to the different news, the fact that the Live Tile is activated is an advantage, since with this we will have the possibility to admire the news that is being developed in real time; but What about the pictures and photographs? This Windows 8.1 tile can be displayed in different ways, which involves a static image, the default icon for photos proposed by Microsoft or images that alternate according to the content of said directory. In this article we will mention to you to modify these characteristics so that you choose, the way in which this tile will be due.
1. Disable Live Tile from Photos tile in Windows 8.1
This will be the first alternative that we will mention at this time, that is, that there are no images that are rotating, having to do so disable Live Tile; for this we suggest you follow the following steps:
- We are heading towards the Starting screen of Windows 8.1.
- We touch or click on the tile of Photos to enter to review its content.
- Once there we activate the Charm on the right side of the screen.
- From the options shown we choose the Configuration.
- Now we choose Options.
- We move the small selector to disable Live Tile.
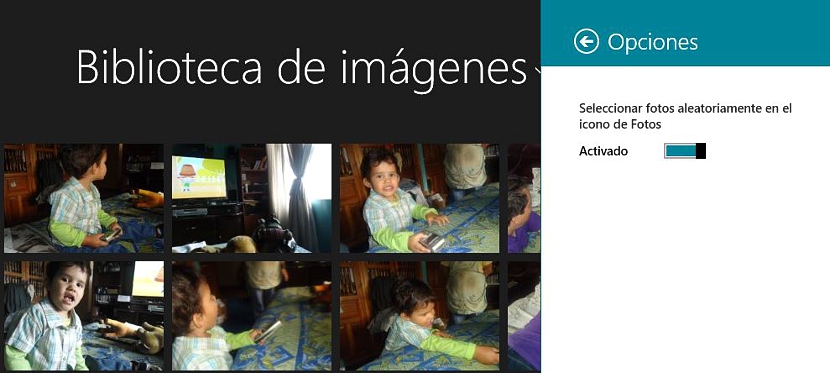
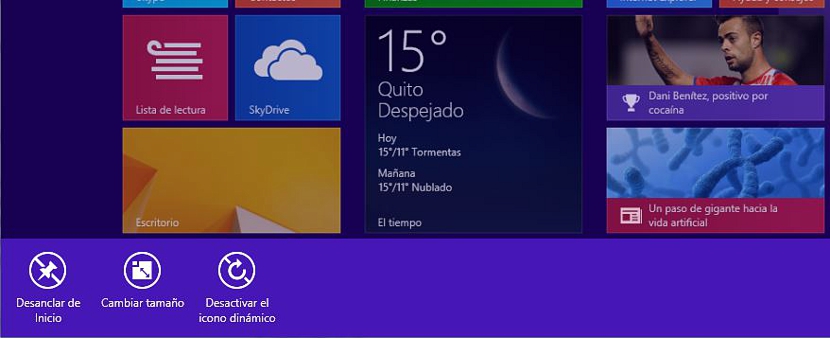
This procedure should be used when the options bar does not show at the bottom "Disable dynamic icon" as you can see below.
2. Select a specific photo for the tile
The procedure we mentioned above is valid only in the event that We do not want any type of image to be displayed on the Photos tile within the Windows 8.1 Start Screen; If you follow the procedure, we will indicate below how you can define a specific image, so that it is displayed on said tile:
- We are heading towards the Windows 8.1 Start Screen.
- We click and enter the directory of the Photos using your tile.
- From the gallery shown we choose the photograph that is of interest to us.
- It will be displayed in full screen.
- We select it again (by touching or clicking on it) to bring up the options bar at the bottom.
- From all of them we chose «Set as«.
- From the society shown we select «Photo Icon«.
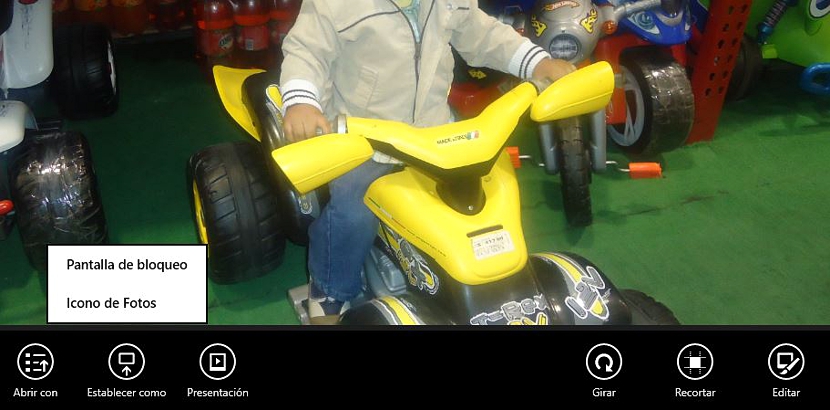
As you can admire, the procedure has also changed in this Windows 8.1 update compared to the previous version. Once you have done these steps you can Go back to the start screen, with which we will admire that the tile of the Photos displays the image to select previously.
3. Include a few images for the photo tile
This procedure can be somewhat longer and a little more complex than those mentioned above, which is why we will try to be quite exact when mentioning the steps to follow:
- If we find ourselves in the Starting screen we headed towards him Windows 8.1 desktop.
- We open a window of File Browser.
- We look for the place where our Library.
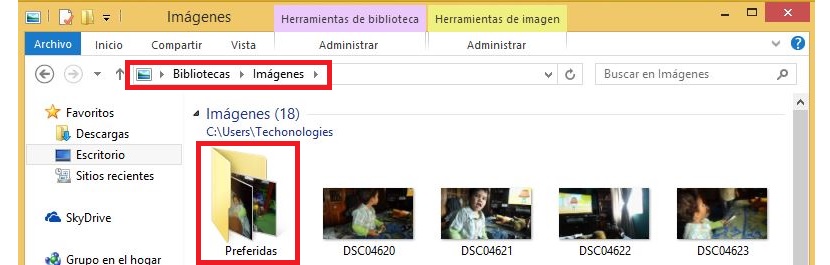
- We turn to the directory of Images.
- Inside it we create an additional folder (we have placed it as Preferred)
Well, all those images that are in the library directory and that are of our interest we will have to select them to move (or copy) them to the Favorites folder that we have created at this time; It is important that we have located our Library and not the respective directories by means of a simple search with the File Explorer; If we have done this, now we must continue with our process:
- We head up to Library Windows 8.1
- We locate the folder Images.
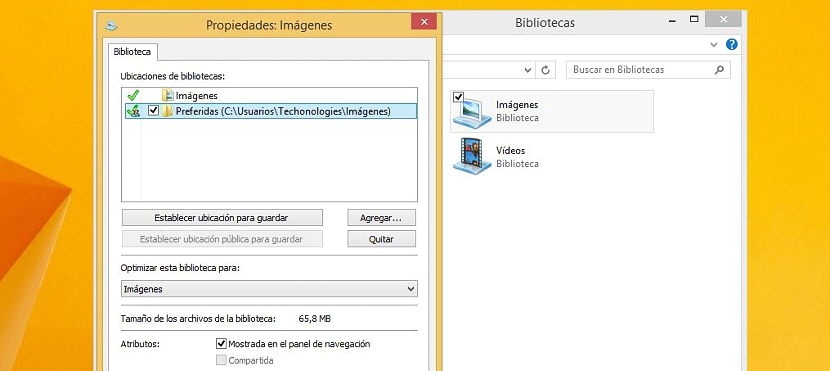
- We click on this folder with the right button of our mouse and choose Properties.
- We click on the button that says Add and we select the newly created folder (Preferred).
- We activate the box at the bottom and that says Show in Navigation Pane.
- We accept the changes through the respective button.
With this simple procedure, those images that we have placed in the folder of Preferred will be the ones that are part of our Live Photo Tile, changes that you will notice after a few seconds or the next time you restart the computer.