
Formatting the computer and reinstalling Windows is a really simple task where it is enough to follow the steps presented. Although we must be precise when executing each action, it is also a reality that this task does not represent an overly complicated challenge. In that sense, We are going to show you everything you need to know about how to format Windows 8, in order to leave your computer as good as new.
As of this version of the operating system, Windows offers the possibility of performing a format and reinstallation from the native options. So, we are going to present all the information you need to take into account to do this easily.
Why do I need to format my Windows 8 computer?
Formatting the computer is a task that we must carry out at least a couple of times a year, in order to maintain the good performance of the computer. Although Windows is a friendly operating system, it is also true that over time it begins to slow down, due to multiple factors. In this way, Formatting and reinstalling is the most effective solution to keep your PC experience to its full potential.
Best of all, since Windows 8, the procedure to be executed is quite simple and does not have too many risks.
Previous steps before formatting
Before getting into the matter of how to format Windows 8, we must take into account a very important factor and that is the information we have on the computer. When carrying out this task, all your data will be deleted, so it is a priority to create a backup beforehand. In that sense, use an external storage unit and save all your files and then reinstall the operating system.
How to format Windows 8?
At the beginning we mentioned that starting with Windows 8, Microsoft has incorporated a function that allows us to format and reinstall the operating system from the native options. This implies that we do not necessarily have to deal with the work of creating a bootable disk or USB, entering the BIOS and then formatting from the installer.. The new way gives all users an opportunity to format Windows 8 without the risk of breaking anything.
Enter the Settings area
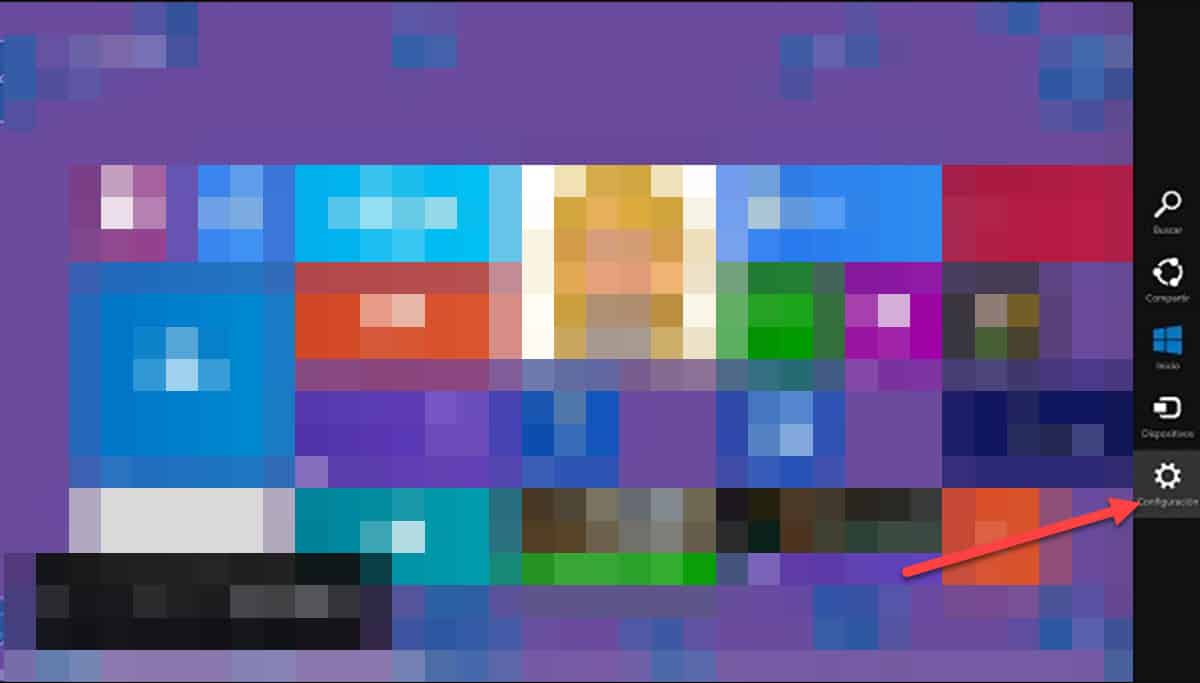
The first step of this process is to enter the configuration section and for this, you must move the mouse to the far right of the screen. This will display the sidebar where the Start Menu is located and the last option, “Settings”, is the one we need, click on it.
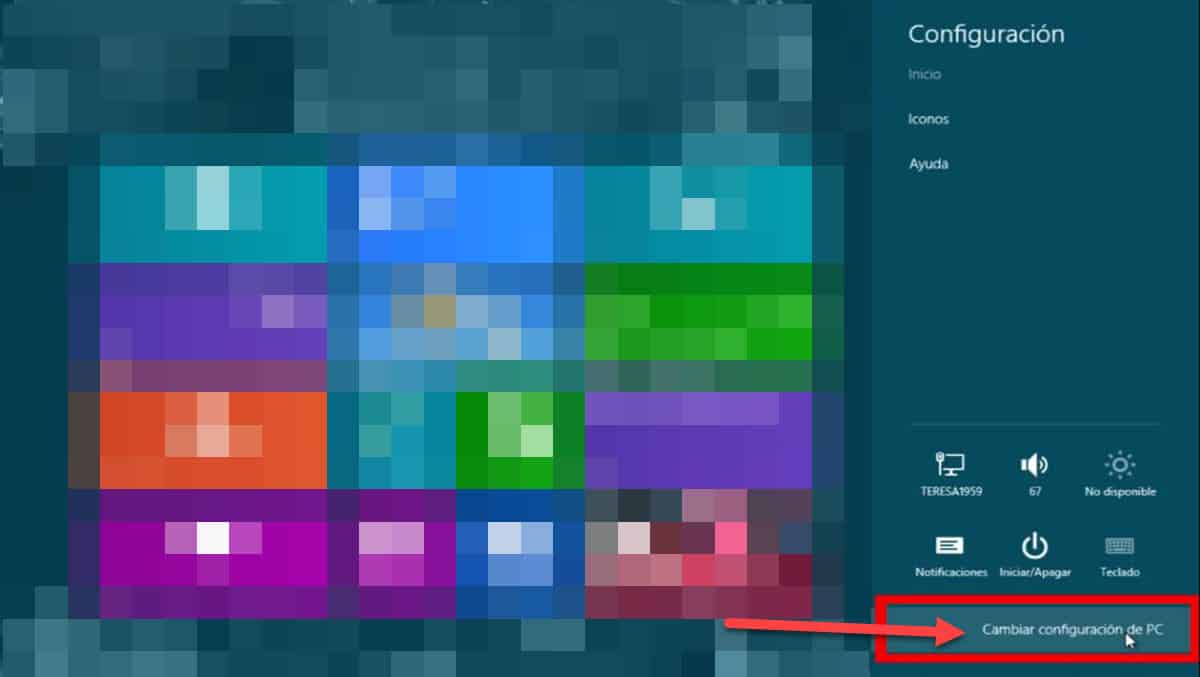
Immediately, new options will be displayed in the bar. The one that interests us is located at the bottom, below the button to turn off the computer and is identified as “Change PC settings”. This will open a new window.
Go to “Update and Recovery”
Within the Windows 8 Settings window, you will see a bar on the left side with a series of options. Go to “Update and Recovery”.

Next, we will be in the section where Windows Update is located and the options to restore the system. Go to “Recovery”.
Remove everything and reinstall Windows

The Recovery menu has 3 alternatives:
- Restore your PC without affecting files.
- Remove everything and reinstall Windows.
- Advanced startup.
Although the former may be effective in certain scenarios, the second option is the most suitable to ensure a clean reinstallation of the operating system. In that sense, click on “Remove everything and reinstall Windows”.
You will then be prompted to choose between quick and full erase. The difference between the two is that the first one will do a simple deletion of the data, while the second one will delete the data without the recovery tools being able to bring it back later. Taking into account that we previously made a backup, it is best to choose the complete deletion.
The other way to format Windows 8
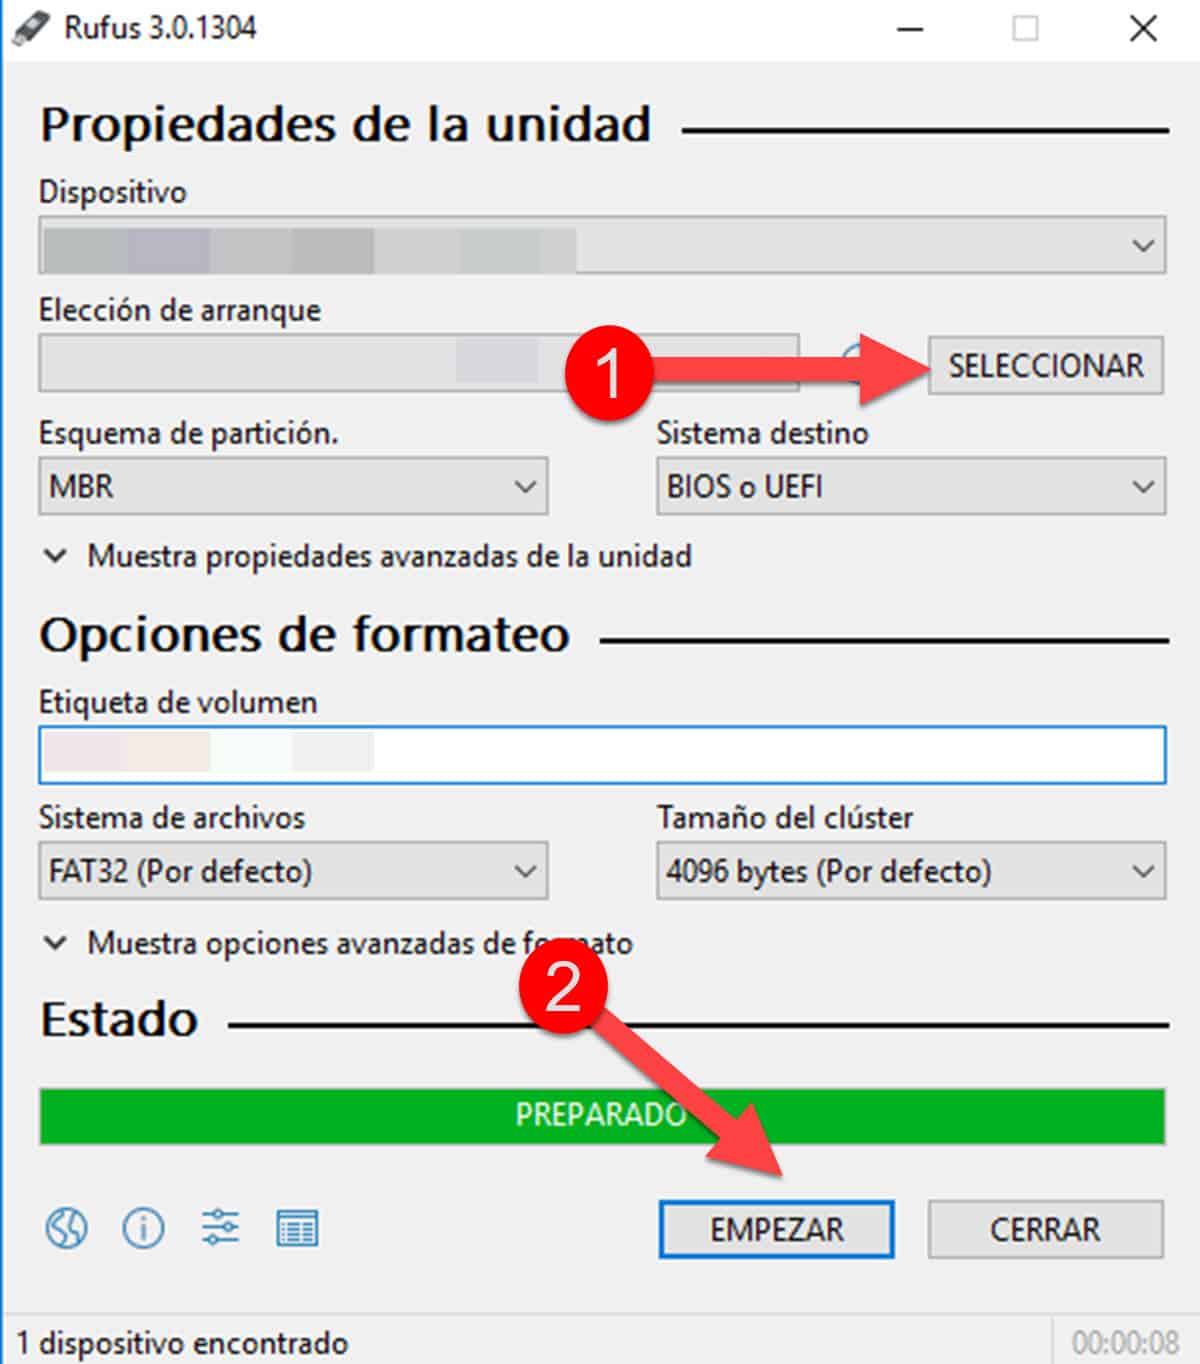
How to format Windows 8 is a question with a simple answer and another a bit more complicated. We saw the easy way before, using the native tool that the system incorporates. However, we can also do it the conventional way, downloading a Windows 8 image and using the application Rufus to create a bootable USB. Given this, we must highlight that Microsoft does not offer support for Windows 8 and in that sense, we cannot obtain the ISO from the official site. That is why you will have to resort to a third-party site, trying to make it as reliable as possible.
Once you have the two files, run Rufus and click the “Choose” button to choose the Windows 8 ISO image on your computer. Finally, click on “Start” and when finished, you will be able to start your computer from the USB.
At this point the matter becomes a bit more complicated, since you will need to know how to enter the BIOS to boot from the Bootable USB. However, this is information that you can find on the page of the manufacturer of your equipment.
Once the installer starts, follow the wizard's instructions and you'll be able to reinstall Windows 8, even keeping your files.