
Surely on more than one occasion you have thought that it is time to buy a second monitor, a second monitor that allows us to work in a much more comfortable way when we are using two applications. Depending on the inches of the monitor, if we do not want to leave our eyes, we can choose to divide the screen.
If we distribute the space occupied by the two, or more, applications that we need to lock or perform any other task, the need to buy a monitor it does not stand up, since it is not only more comfortable to look at a single screen, but also, we will save space on our desk, something that never exceeds.
Most applications, like browsers, are designed to automatically modify its interface when we reduce or enlarge the size of it, in order to show the necessary information without taking up more space than necessary, so if your concern is about this simple problem, you can forget about it.
Windows and macOS allow us to divide the screen natively no need to install any third party application. However, while the number of options that Windows offers us is very high, in macOS, there is only one option, an option that also eliminates the application dock, so for many users, including myself, it is not one. good option, so we are forced to install third-party applications.
Split the screen in Windows 10
For divide the screen of our desktop into 2, 3 or 4 windows in Windows 10, It is not necessary to install any application in Windows 10, since Microsoft natively offers us a method that allows us to do it quickly and easily through the mouse.
If you are a regular user of the keyboard shortcutsYou can also access this function through a combination of keys, a method that will also be found later.
Split the screen into 2 windows with Windows 10
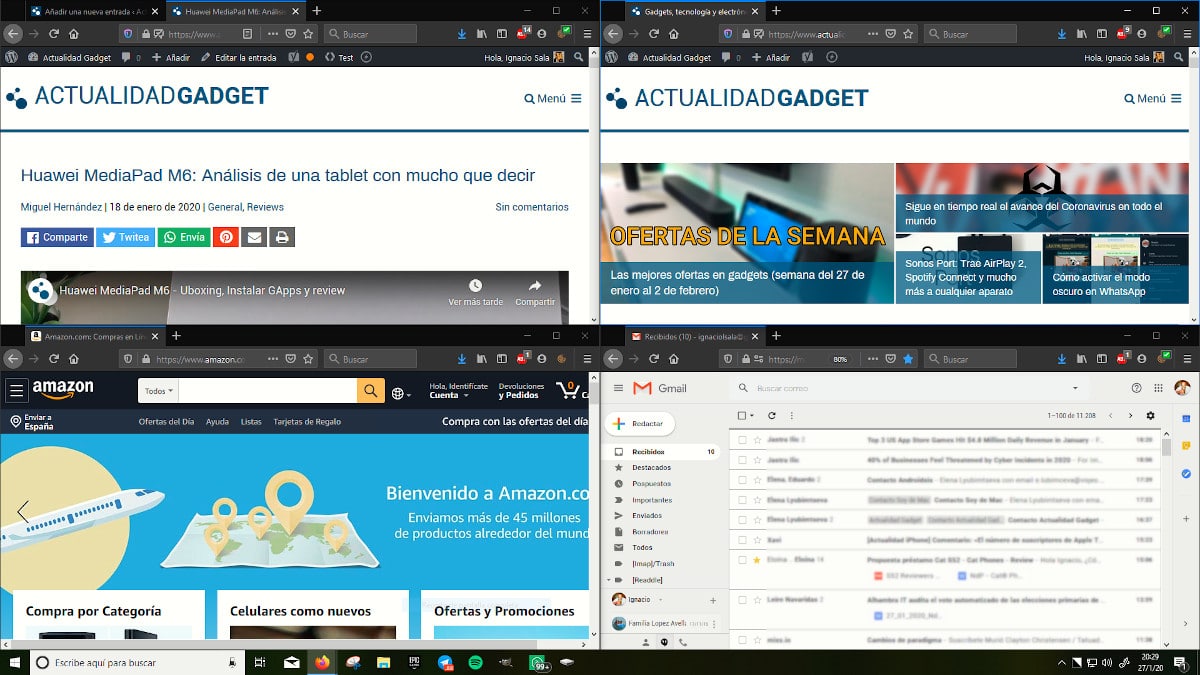
The fastest method to divide the screen of our computer into 2 windows is using the mouse. To do this, we just have to open the two applications that we want to divide on the screen on the same desktop.
Next, we must click on the upper bar of the application and drag it to the side of the screen where we want it to be located (left or right) and wait a second until a virtual frame appears that will show us the size of the application.
Once we have fixed one of the applications to one of the sides of our monitor, we must carry out the same process with the other application. The good thing about this feature in Windows 10 is that does not force us to fix another application on the side, so we can leave the desktop background with a floating application window.
Split the screen into 4 windows with Windows 10
To divide the screen of our computer with the four applications that we need to have open, we must follow the same process above, but this time, we must drag the applications that we want to distribute to the corners of the desktop where we want to place them.
Once the frame of the space they will occupy is shown, we just have to release the mouse to make the application look at occupying that size. This function allows us to adjust three applications automatically, so if that is what we are looking for, we will have to adjust the size of each of the applications manually.
Modify the size of split screen applications

It never rains to everyone's liking, and in this case it is no exception. It is likely that the size shown by each of the applications that we have divided on the screen does not fit our needs.
If this is your case, and you want to modify the width that the applications occupy, you just have to go to the center line that separates them and drag with the mouse to make each of the two or four windows shown larger or smaller.
Split the screen on a Mac
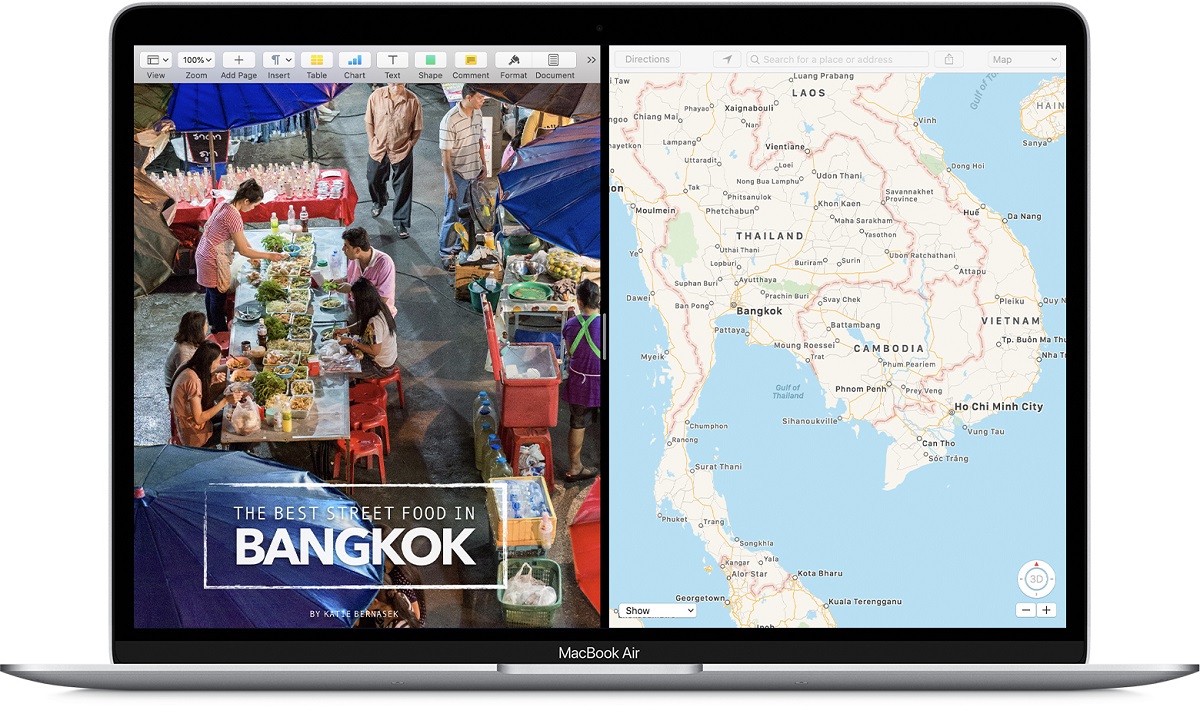
The function in macOS that allows us to divide the screen into two applications is called Split View, the same name of the same function that is also available on the iPad. This feature was introduced in macOS by OS X El Capitan, so if you have a version older than this, you will have to resort to third-party applications to enjoy two or more split-screen applications.
The operation of this function is not as fast and intuitive as the one found in Windows 10. To use the Split View function that allows us to divide the screen into two applications, we must use the Maximize button, the green button that It is shown in upper right corner of the application / window. We must press and hold the green button until all the applications that we have open on the desktop are shown.
Then so we have select the two applications that we want to be shown in the middle of the screen. MacOS will automatically resize the two apps so that they display equally on the screen. This is where this function ends, a function that does not allow us to modify the size of the windowss that are displayed on the screen, as if we can do in Windows 10.
Another drawback that this function offers us is that automatically remove app dock to display the applications in full screen, so if we want to access another application, we must change the desktop, stop using the function or access the application dock through a keyboard shortcut.
Split the screen in Windows 7 / 8.X
Splitting the screen on a Windows 7 or Windows 8.x computer is a process that we can do via keyboard shortcuts without having to resort to third-party applications. This method is also compatible with Windows 10, although the process to do it through the mouse that I have explained above is much faster and easier.
If we want to show two applications on the screen of our computer, we must first select the first application to relocate and pressing the Windows key button, press the scroll arrow left or right, depending on where we want to place it.
But if our needs go through show 4 apps on the screenWe can also do it through this same combination of keys, but also using the up and down arrows to find the location we are looking for for the applications.