Photographing people is a great way to capture an emotion, portray the subject, and preserve the memories of your loved ones.
It is a gender photography very easy to master, you just have to have a camera and a willing model. Convert your portraits to black and white it's a great way to give them a timeless atmosphere and reduce the effect of background distractions. Today I bring you, the Tutorial: How to take a black and white photograph

Use aperture priority
Set your camera's dial to aperture priority mode and then select a wide aperture. This will help you blur the background to make the model really stand out in the photo. If the aperture is too wide and some parts of the model will be out of focus, a larger f-number will be used if necessary. Then use manual focus or selective autofocus and focus on the subject's eyes as this will be the most important part of the shot.

Select a focal length
Reducing the magnification and using a short focal length will cause lens distortion and exaggerate the characteristics of the subject. Since this doesn't create great photos, try taking a few steps back and then zooming in to keep everything in its correct proportion.
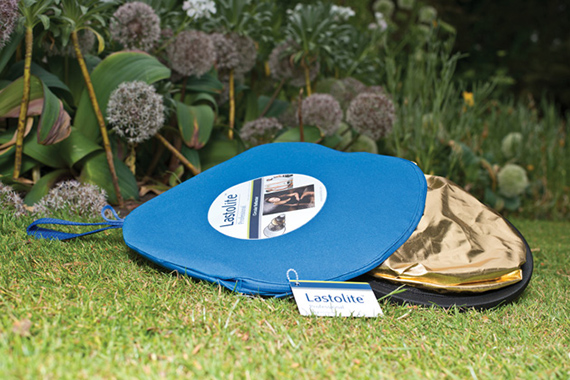
Bounce the light
To create a balanced distribution of light and avoid hard shadows fall onto the subject's face, use a reflector to bounce the light back and eliminate shadows. If you don't have a reflector, try shooting outdoors in the shade or on a cloudy day. In a previous post we saw the Tutorial: Different ways of photographing movement, Do not miss it.
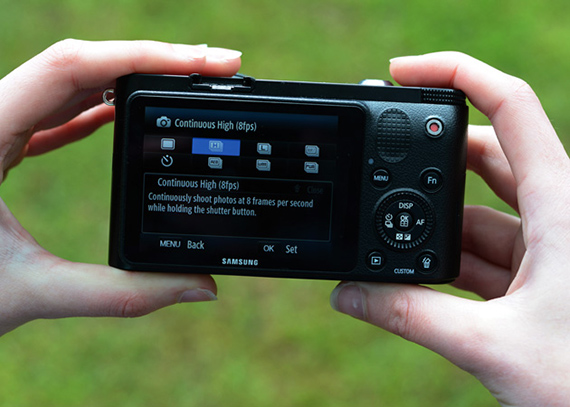
Avoid blinking eyes
Capturing the subject that's blinking is one of the biggest problems with portrait photography, so if your camera has a blink detection feature, use it to make sure you get a great photo. Alternatively, you can use the continuous shooting mode to take a series of photos in rapid succession as you shoot. You can then choose the best of the entire run.
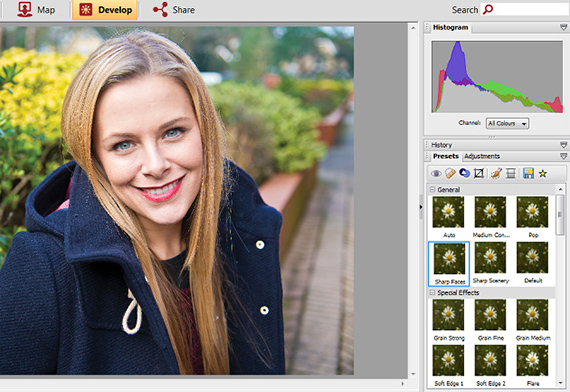
Sharpens
Matter your photo en Serif PhotoStack, and select the option Develop at the top of the screen and select your photo from the library at the bottom. Click on the option Presets from the edit palette on the right of the screen and then select the option Sharpen Faces. If you want more control over sharpening the image, click the option Settings and then open the menu Details. The unsharp mask function will let you choose the amount of sharpening you apply to it.

Correct the exposure
In the Settings, Open the menu Levels. To quickly correct the exposure, you can click the button Automatic levels. However, if you want to adjust manually, move the sliders below the histogram graph until you are satisfied with the results.

Remove stains
If there are any imperfections in your photo, such as blemishes or missing hair, select the tool Spot repair from the edit palette.Adjust the brush size based on the size of the problem area and then set the opacity to 100%. Choose Heal from the Type from the drop-down menu, then click the area of the shot that you want to correct. Now click Apply. If you are not satisfied with the results, use the clone to replace the problem area with another sample from your photo.
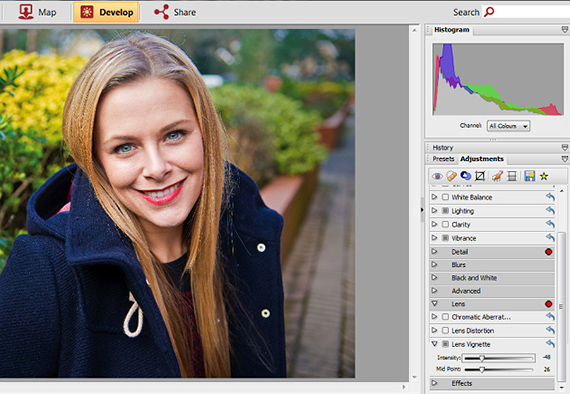
Add a bullet
To ensure that the bottom of the photo it does not distract from its main objective, you can darken it by adding a vignette. Enter the tab Settings, in the lens menu, and then click the arrow next to the lens Vignette. Adjust the slider Intensity to strengthen the effect and the slider mid point to decide which part of the image it covers.
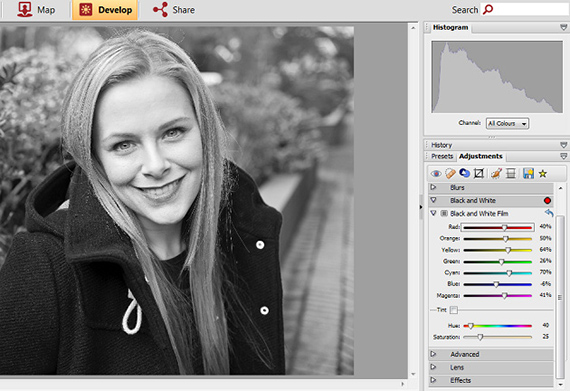
Convert to black and white
In the Presets there are tons of quick options to convert your photo to black and whiteHowever, if you want more control over the conversion, go to the tab Settings and select White and Black. Here you will find a bunch of sliders that allow you to adjust the color tones of the image. Experiment with adjusting each of them until you achieve the desired effect.
Save and export
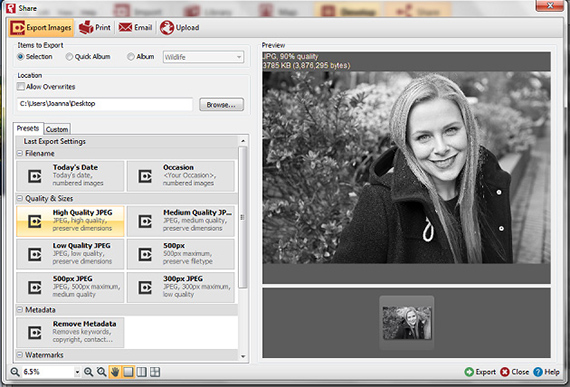
When you're done editing, click the tab Share At the top of the screen, a box will appear asking if you want to save your photo, so click Yes. Now you can export the image from PhotoStack and save it back to your computer. Just select a destination to save it and then choose from a series simple presets size and quality before clicking Export.
Share on Facebook
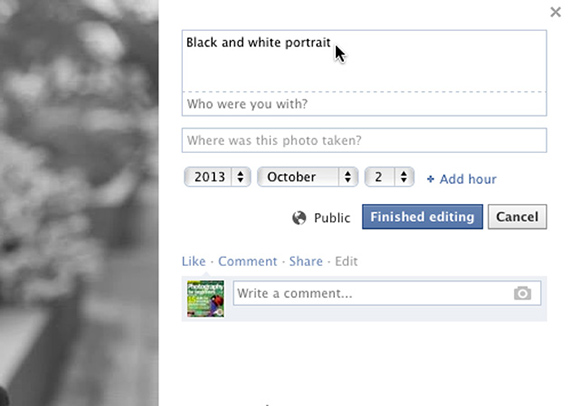
Go to www.facebook.com and create an account or log into your existing profile. On your profile page, click the photos option at the top, and then click Add photos. Here you can share your photo with a description and tag it with the place where you took it and the person in the photo.
More information - Tutorial: Different ways of photographing movement