
Someone could imagine that this task is one of the most useless to perform, a situation that is not the case because in different parts of the world Windows XP is still used although, without the support provided by Microsoft.
Proof of this is what is currently happening in certain countries and regions of the globe, mentioning China among them and of those who comment, that they will use their own operating system instead of switching to something different than Windows XP. In this article we will show you how to customize this operating system so that you have only what you need, something that could be used to later install it on computers with little RAM and a small hard drive.
Configure our Windows XP with nLite
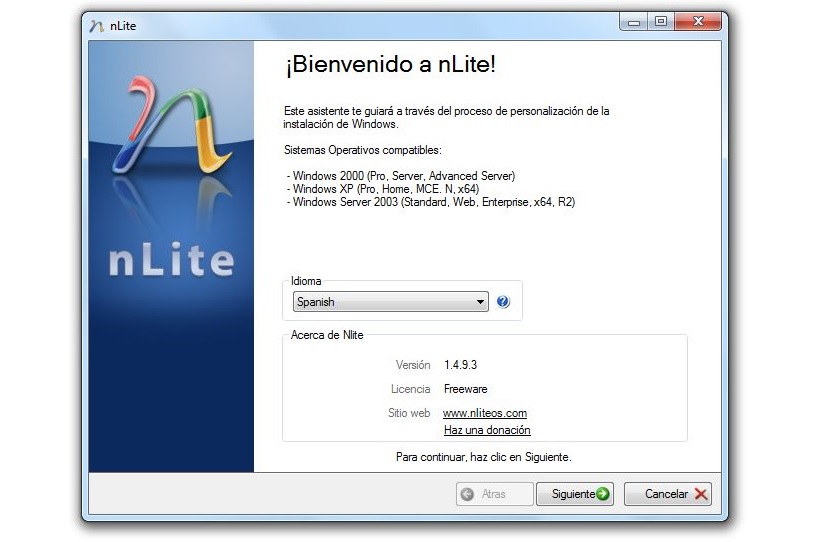
We recommend that you go to the official website of the nLite developer so that you can download their tool. You will have to install it instead of running it as a laptop. After you have concluded this process, you will find a first screen in which you will have the possibility to define the language you want to work with in the interface of this tool. It is worth mentioning that the language does not represent the resulting version of Windows XP that we will make with this method.
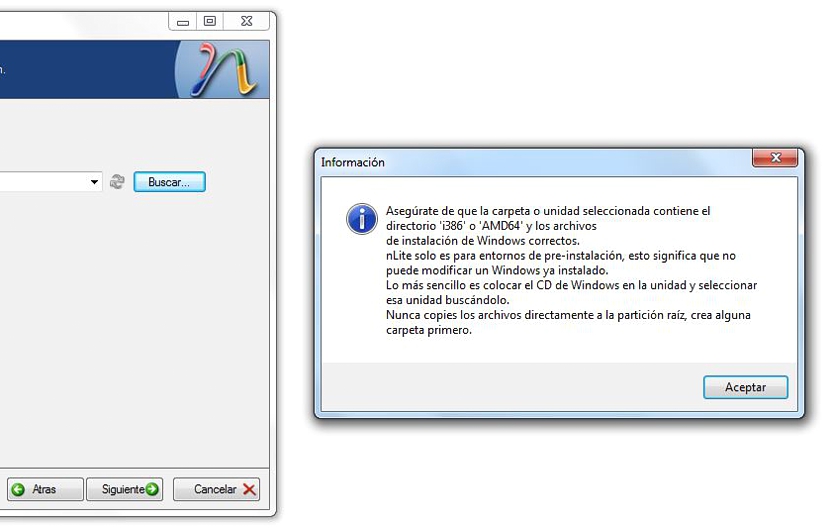
In the next window we will have to choose the button «search» to find our CD-ROM with Windows XP; if it is not yet inserted to the disk you can do it at this time If you make a mistake and insert the wrong disk, a message will appear suggesting that we try to locate the folder «i386«, Because there are all the elements required for the installation of this operating system.
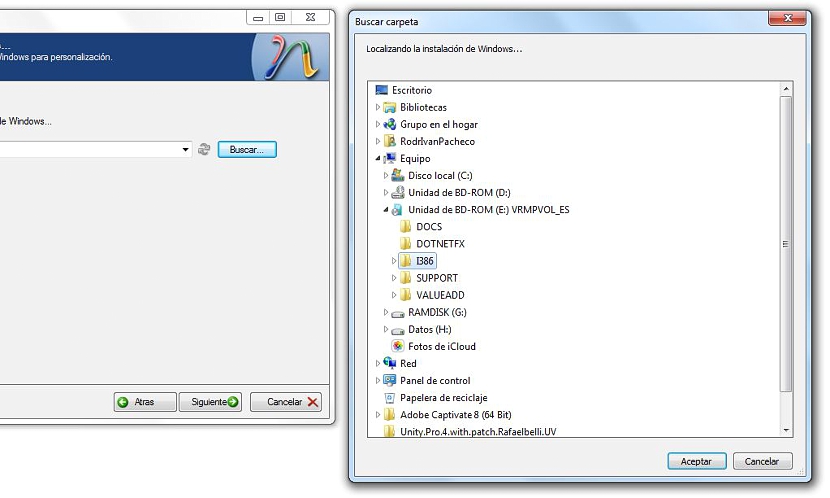
After we have located this directory, we will only have to select it in the pop-up window that has appeared. We will close this window by clicking on the button that says «to accept«.
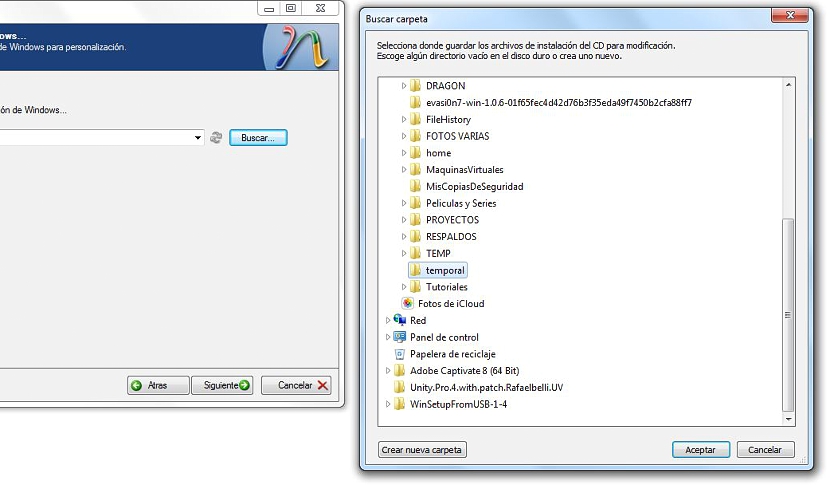
Immediately another message will appear, which warns us that a new window will appear, in which we must define where the disk image will be saved with modified Windows XP operating system.
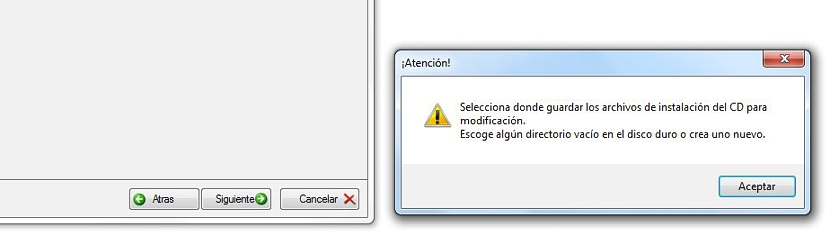
We will only have to select a specific folder or directory to be hosted there, all of themthe files and the ISO image of our modified Windows XP (or processed).
After pressing the button «siguiente»The process will start immediately, which we will notice thanks to the progress bar that will be located at the top.

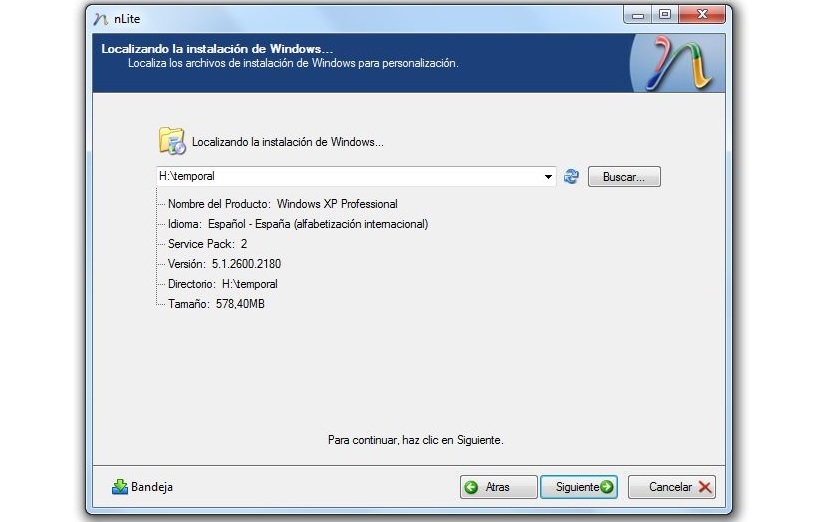
When this process (which is actually a copy of the files from the CD-ROM to the hard disk) has finished, we the operating system features and specifications will appear that we are going to process. Right there we will have the opportunity to admire the version of Windows XP (or any other operating system that we have chosen), the Service Pack number it has, its version, the folder where the files are located and of course , the weight in megabytes of all content.
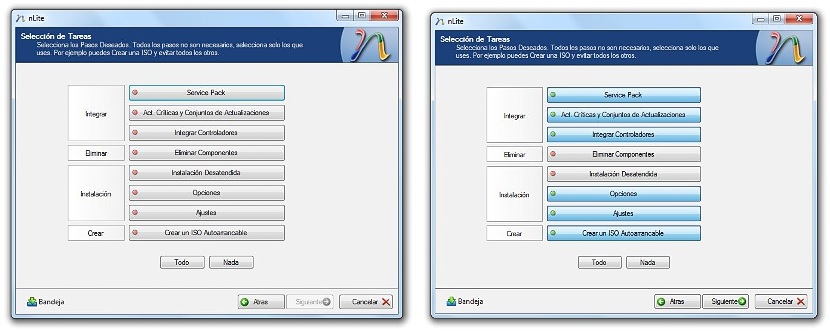
Clicking "siguiente»We will jump to a completely different window; There will appear a few options as small tabs, which will have a red button towards the left side. This red button represents that we have not actually selected this option to integrate into the ISO image that we are going to try to obtain; here we should only select the options that we want to have on our resulting Windows XP disk.
After that we have to click on the button «siguiente»So that nLite tried to compile our choice and offer us at the end, the ISO image of said disk.
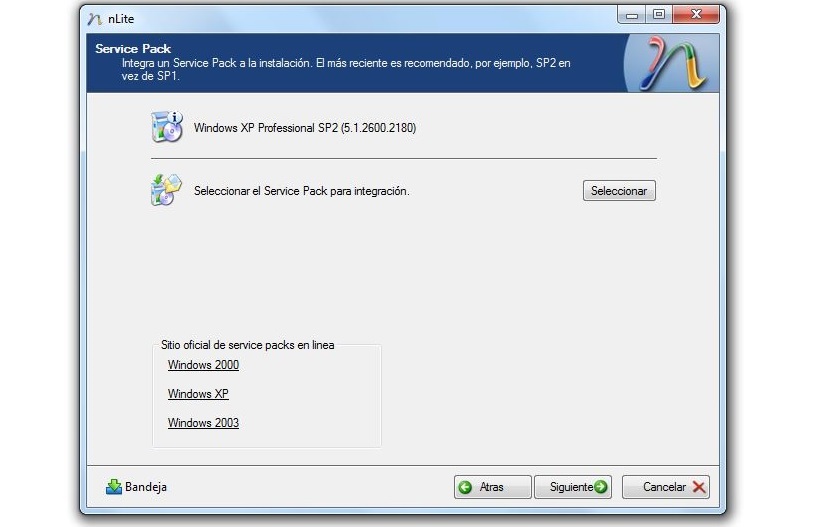
It is worth mentioning slightly, that in the last screen in which we have stayed there are also a few alternatives to add; for example, from right here we could get to integrate a new ServicePack if we have it at hand, although we could also choose to download it from the web with the links shown towards the bottom left.
Since Windows XP no longer has support offered by Microsoft, we will not find a new patch on their servers, although we could use the one mentioned in this news and which theoretically would be ServicePack 4; If we are trying to customize a Windows 2003 operating system, there is still support for it, so if we choose it we will jump to the Microsoft download window.
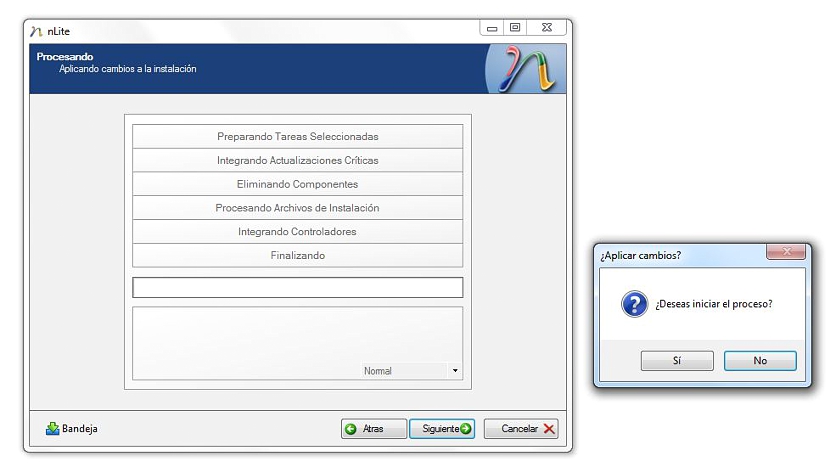
With everything we have done so far, we will have absolutely everything ready to start generating our modified Windows XP disk. The last screen that will appear will ask us to press the "yes" option.
When the process ends we will find the ISO image ready for us to save it on a CD-ROM on a USB stick, something that we can use to install on any other computer that we want. If we have an old computer with few resources, then we could use the suggested method to create a Windows XP that does not need a super computer to function.