All those users who have a Gmail account, they will automatically be credited to a storage space service in the cloud, which has the name of Google Drive; actually this space contemplates about 15 GB completely free, reaching a total of 25 GB added to what the firm offers us with Gmail and Google photos.
Now we will suggest you to perform a little trick in which you will have the ability to store all the attachments you receive or send from your Gmail account, to a reserved space within the email client, which can be used as a small repository or in other words, an additional space in the cloud.
You may be wondering right now the reason why you should create this reserved space; Assuming that you start sending and receiving important documentation (photos, Office documents, audio or video files, and much more) personally and at work, you may need to quickly review this information at a certain point. Using certain keywords and the internal Gmail search engine you could find all this, although with some delay.
The other solution would be to export all these documents or files to the Google Drive account and start creating certain categories to make a correct differentiation.
If we create a reserved space within our Gmail client, All those attachments that we send or receive at a certain time (with an email), will be hosted in this place that we will now recommend creating.
Creating a reserved space to house our attachments
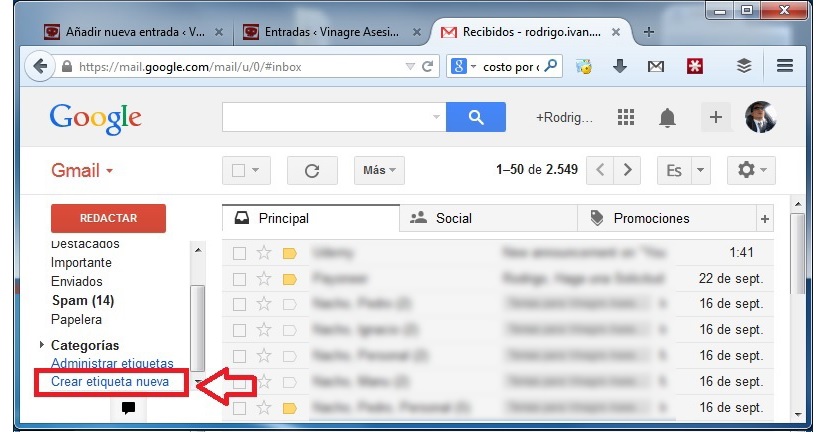
If you have been interested in this topic then we suggest you follow the following sequential steps; the first of them we will have to handle from our Gmail inbox; for this, we only have to go to the end of the left sidebar, where we will find an option that says «create new label«.
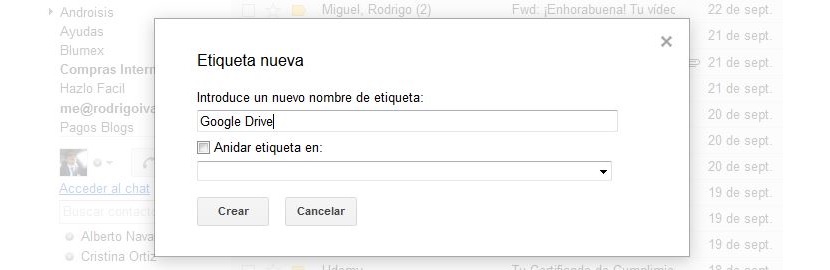
When selecting this option (as shown in the previous image) a new window will appear; there we will have to place a name that we can clearly identify, a suggestion being "Google Drive" although, to differentiate from the service offered by the firm, we could also choose put the name «Gmail Drive».
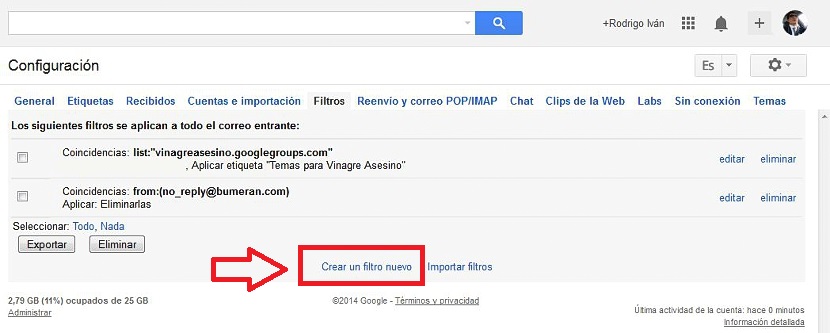
After having created this label, we will be able to notice that it will always be displayed in the left sidebar. For the moment this space will be empty, although from now on, every time we receive or send certain attachments, they will begin to be hosted there. For this to happen we must make a few modifications to the settings; now we must click on the gear wheel in the upper right part of Gmail, having to choose the «setting«.
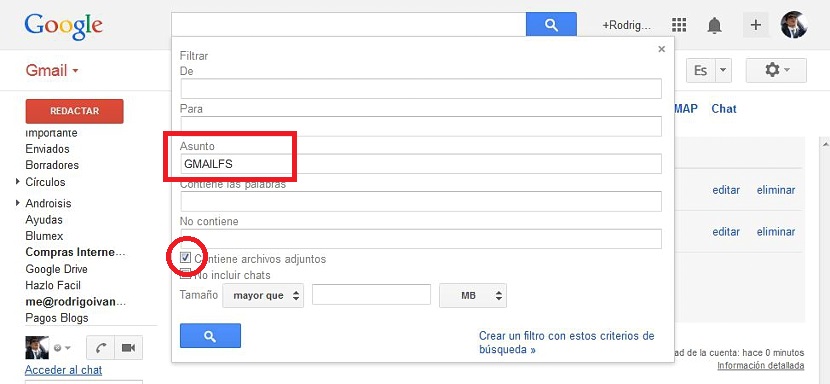
Once we are in the configuration area, we will have to select the «filters«. We just have to go to the bottom of the screen to «create a new filter»With the option there.
We will jump immediately to a new window, where we must place only the keyword «GMAILFS"Within the" subject "area. We must also activate the box at the bottom that says «contains attachments»And then click on the option that says «Create a filter with these search criteria«.
Now we will find ourselves in another configuration window, where we must activate the boxes that you can admire in the image that we have placed. With this, we will order that the attached files are not stored in our inbox and that rather, are hosted in the folder (labels) that we created earlier. This means that they will automatically move to "Google Drive" or "Gmail Drive", depending on the name we have chosen for that label.
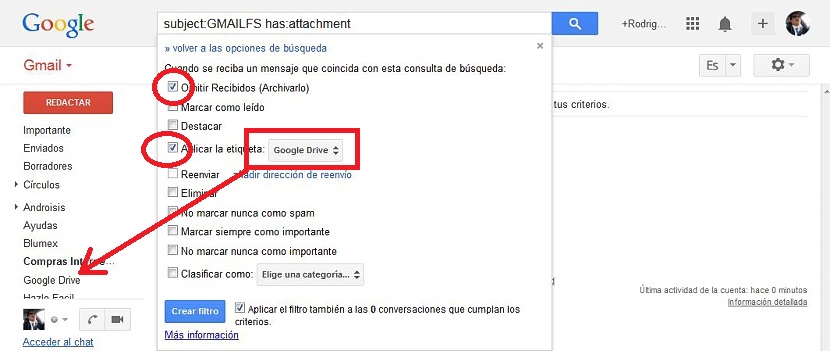
Now we will only have to press the blue button that says «create filter»So that everything happens.
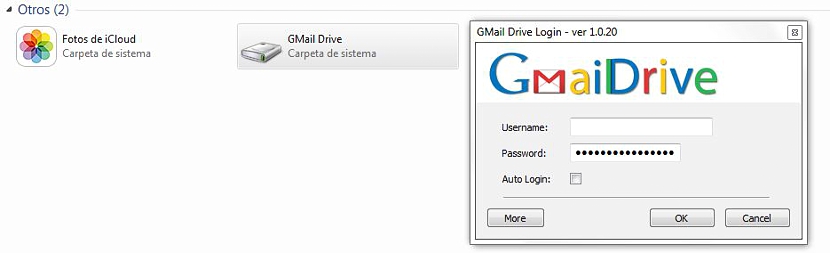
In this way, we have managed to make the attachments saveable in a reserved space within our Gmail accountThis is thanks to the creation of a label, which represents the trick we have suggested. Now, there is a small tool that we could use completely free so that we have access to this "Gmail Drive" folder from our file explorer.
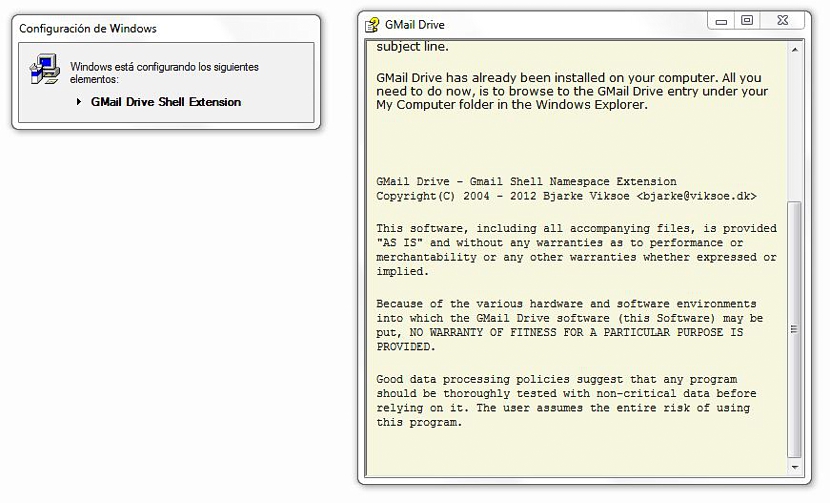
You can use this tool download from the following link, which after being installed will add a new unit.
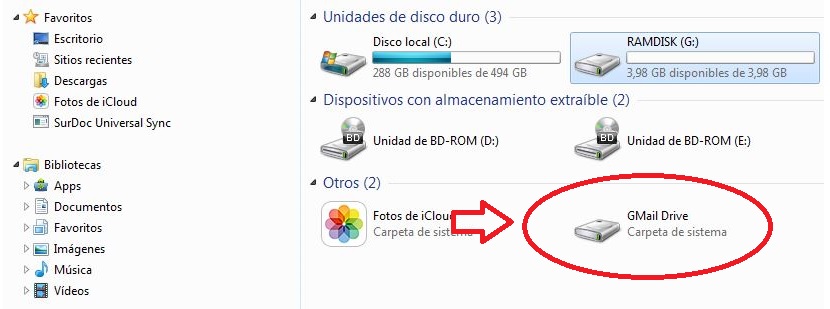
When you double-click on that unit, you will be asked to enter the access credentials, that is, username and password that you use to enter Gmail (like the first image placed at the top)
Under this working mode, you can now check the contents of the folder from the desktop of your computer and using the file explorer. It is worth mentioning that this little client is not compatible with Gmail when in the mail account, the «double check»As a security measure.