
Despite having a super-powerful computer thanks to the characteristics and technical specifications with which we have decided to assemble it (or buy it), we never get to know the reason why at some point it becomes considerably slower in behavior.
It is practically incredible that having this same computer with a recent technology processor (with several cores in its architecture) and also, with a good amount of RAM, running a few professional applications they could be quite a hassle when working with some of its functions. The problem is not really due to the characteristics of the software or hardware that we have in our personal computer, but rather, because by default Windows configures the applications that we have installed to work with all the cores that are part of our processor. In this article we will recommend a few tricks to follow to use only a certain number of these cores and thus optimize the working efficiency of our processor.
Configure the number of cores to use in Windows XP
You may not have a personal computer with Windows XP because Microsoft has practically left it without support for a long time; Anyway, if you have this operating system on your work platform, we recommend you perform a few steps so that you can define, the number of cores of your processor for a specific application.
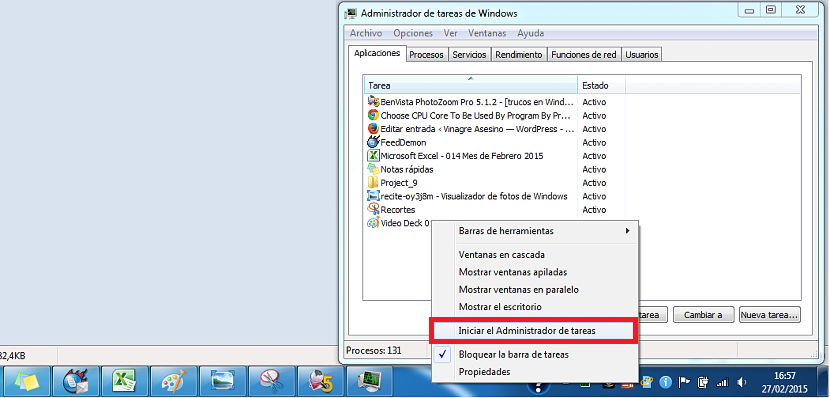
- After you have started a full session in Windows XP, we recommend that you use the keyboard shortcut that calls the "Task Manager" (CTRL + ALT + DEL).
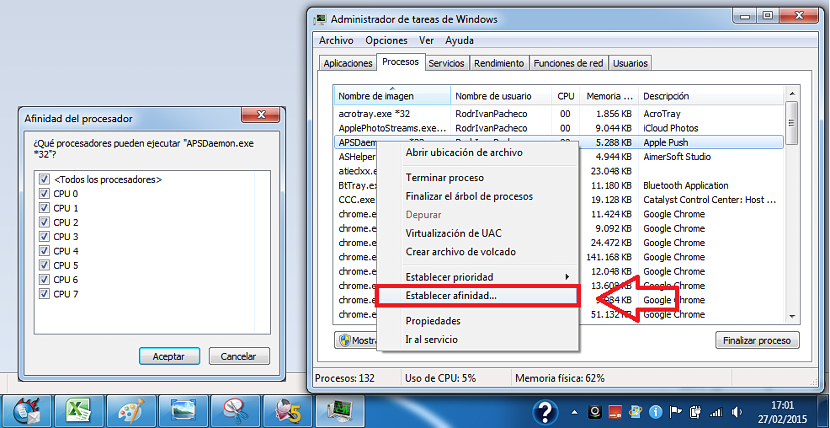
- From the window that appears, you have to go to the «Processes«, Having to choose the one you want to configure but with the right button of the mouse. Right there you will see a few options from its «contextual menu», having to select the one that says «Set affinity«.
With these only two steps that we have carried out, an additional window will immediately open, where all will be present the cores that are part of our processor. We only have to check the boxes of the cores that we want to work for the application (or process) that we have selected from the beginning.
Configure the number of cores to use in Windows 7
The same situation can be achieved with Windows 7, there are only a few details to mention because if it exists, a little difference in procedure, compared to what we suggested above.
As before, here we also have to call the "Task Manager", something that can be done easily with the keyboard shortcut "CTRL + Shift + Esc" or by using the right mouse button on the "Task Bar ».
Once we have this Windows 7 "Task Manager" in sight, we must go to the "Processes" tab; here we also have to look for the process that corresponds to the application that we want to configure with a specific number of cores, having to use our right mouse button as we did previously.
The window that will appear with the number of cores is a little different from the one shown in the previous process. Here we also have to leave activated only the boxes of the cores that we want to work with that specific process or application.
Trick to configure the number of cores in Windows
Basically the procedure could be done in Windows 8 or Windows 10, there are small details that you will surely be able to decipher quickly. Now, an additional trick that we are going to mention right now will help those people who do not know what the "process" is that we want to configure or that belongs to a specific application. If you do not know which process to identify, we recommend that you go to the first tab of the "Windows Task Manager" window; this tab is the one of the «Applications«, Having to search there for the running tool you want to process. You just have to select it with the right mouse button and later, make use of the option that says «Go to Process«, At which time you will automatically jump to the other tab and where you have to follow each of the steps that we mentioned before.